

How To Remove Icloud Link From Iphone
Do you want to share your iPhone photos with friends and family? With iCloud Photo Sharing, you can easily share photos and videos with just the people you choose. In this tutorial, you'll discover how to use iCloud Photo Sharing on your iPhone, iPad, or computer. Read on to start sharing your best photos with the people you care about.
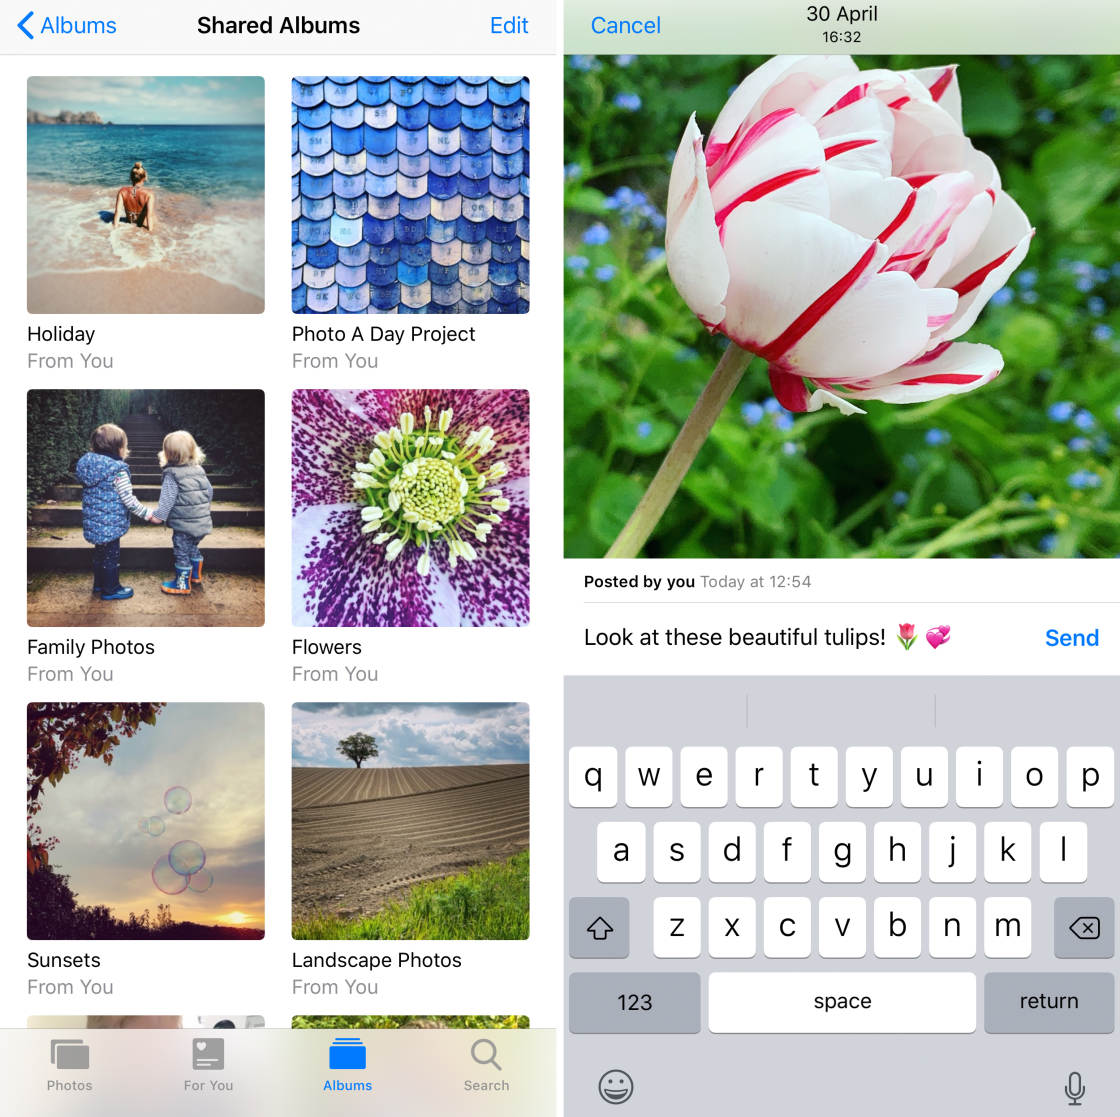
Table Of Contents: iCloud Photo Sharing
Click any title link below to go straight to that part of the tutorial.
What Is iCloud Photo Sharing?
1. How To Set Up iCloud Photo Sharing On Your iPhone Or iPad
2. How To Use iCloud Photo Sharing On Your iPhone Or iPad
2.1 Create A Shared Album
2.2 Invite People To Your Shared Album
2.3 Add Photos To A Shared Album
2.4 Subscribe To A Shared Album
2.5 Like & Comment On Photos
2.6 Save Photos From A Shared Album
2.7 Delete Photos From A Shared Album
2.8 Remove A Subscriber From A Shared Album
2.9 Delete A Shared Album
3. How To Use iCloud Photo Sharing On A Mac Computer
4. How To Use iCloud Photo Sharing On A Windows Computer
5. Shared Album Storage Limits
What Is iCloud Photo Sharing?
iCloud Photo Sharing is a free service offered with Apple's iCloud service. It's a great way to share your photos and videos with family, friends, and colleagues.
iCloud Photo Sharing uses Wi-Fi. So you don't need cables, USB, Bluetooth, or email to share your photos.
With iCloud Photo Sharing, you create a shared photo album for the images you want to share.
You can then choose who you want to share it with (up to 100 people).
Subscribers can view, like, and comment on photos in a shared album. They can also add photos and videos of their own.
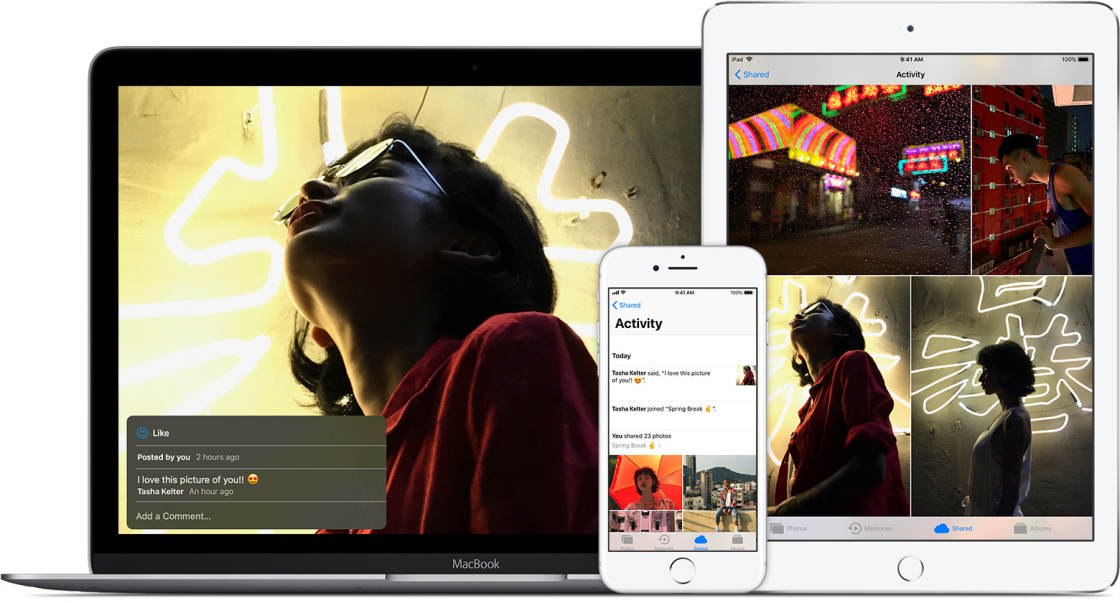
iCloud Photo Sharing lets you share photos and videos from your iPhone, iPad, iPod Touch, Mac, or Windows computer. You can even share photos with people who don't have iCloud Photo Sharing set up on their device.
Unlike Instagram or Facebook, shared iCloud albums only let people you've invited see photos. This offers greater privacy of your images as it keeps them out of sight of the public.
Shared photos and videos are stored in iCloud. But they don't count against your iCloud storage limit. You're free to share up to 5,000 photos without having to pay for more storage.
1. How To Set Up iCloud Photo Sharing On iPhone Or iPad
Before you begin sharing photos, you'll need to set up iCloud Photo Sharing on your iPhone. You can also use these instructions to set up iCloud Photo Sharing on your iPad.
For the best experience, it's advisable to update your iPhone or iPad to the latest iOS.
You can do this by opening the Settings app from the home screen of your iPhone. Then go to General > Software Update. If there's an update available, follow the on-screen instructions to download and install it:

iCloud Photo Sharing is an Apple iCloud service. So you'll need to sign in to iCloud with your Apple ID on your iPhone.
Go to Settings, then find the iCloud option and sign in with your Apple ID and password.
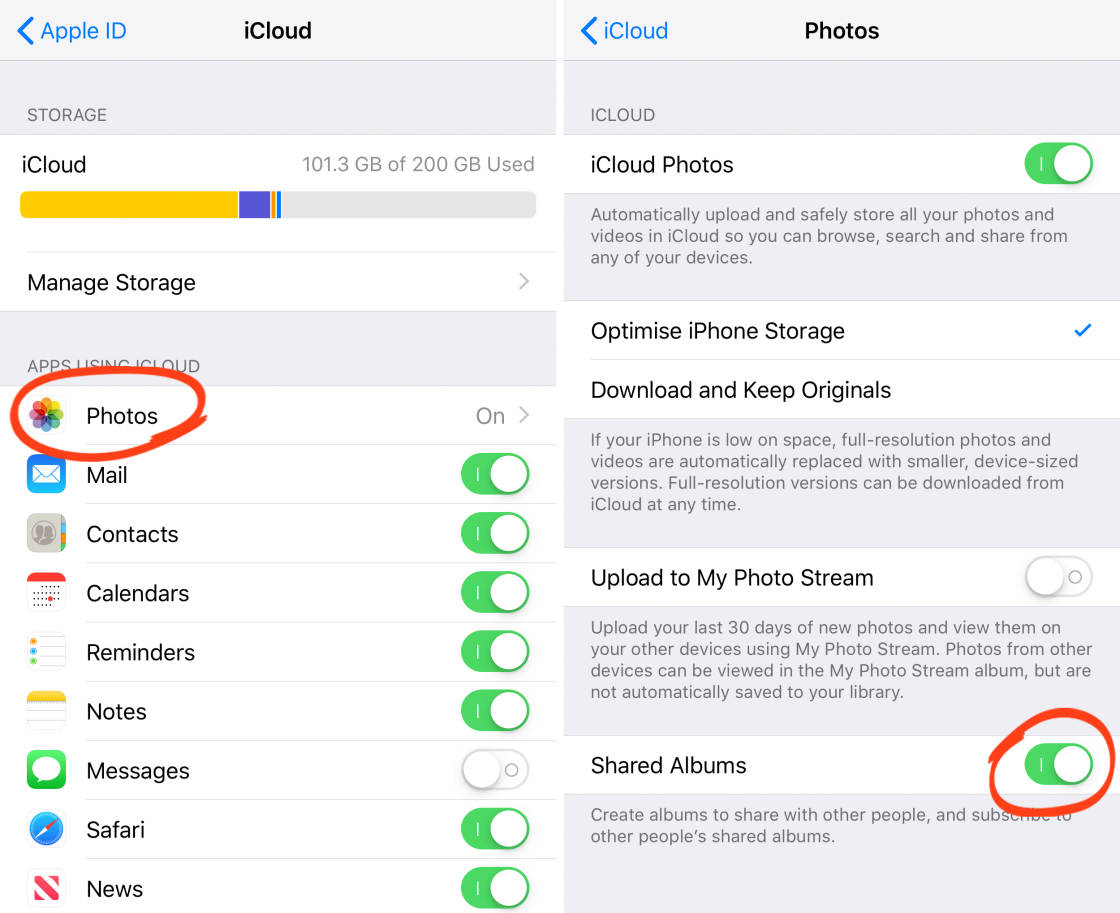
Once you've signed in to iCloud, go to Settings> [your name] > iCloud > Photos. Switch on theShared Albums option at the bottom of the screen:
2. How To Use iCloud Photo Sharing On Your iPhone Or iPad
In this section, you'll discover how to use iCloud Photo Sharing to share your photos with others.
iCloud Photo Sharing works in exactly the same way on both iPhone and iPad. So you can use these instructions to share your photos from either device.
2.1 Create A Shared Album
The first step is to create a new shared album.
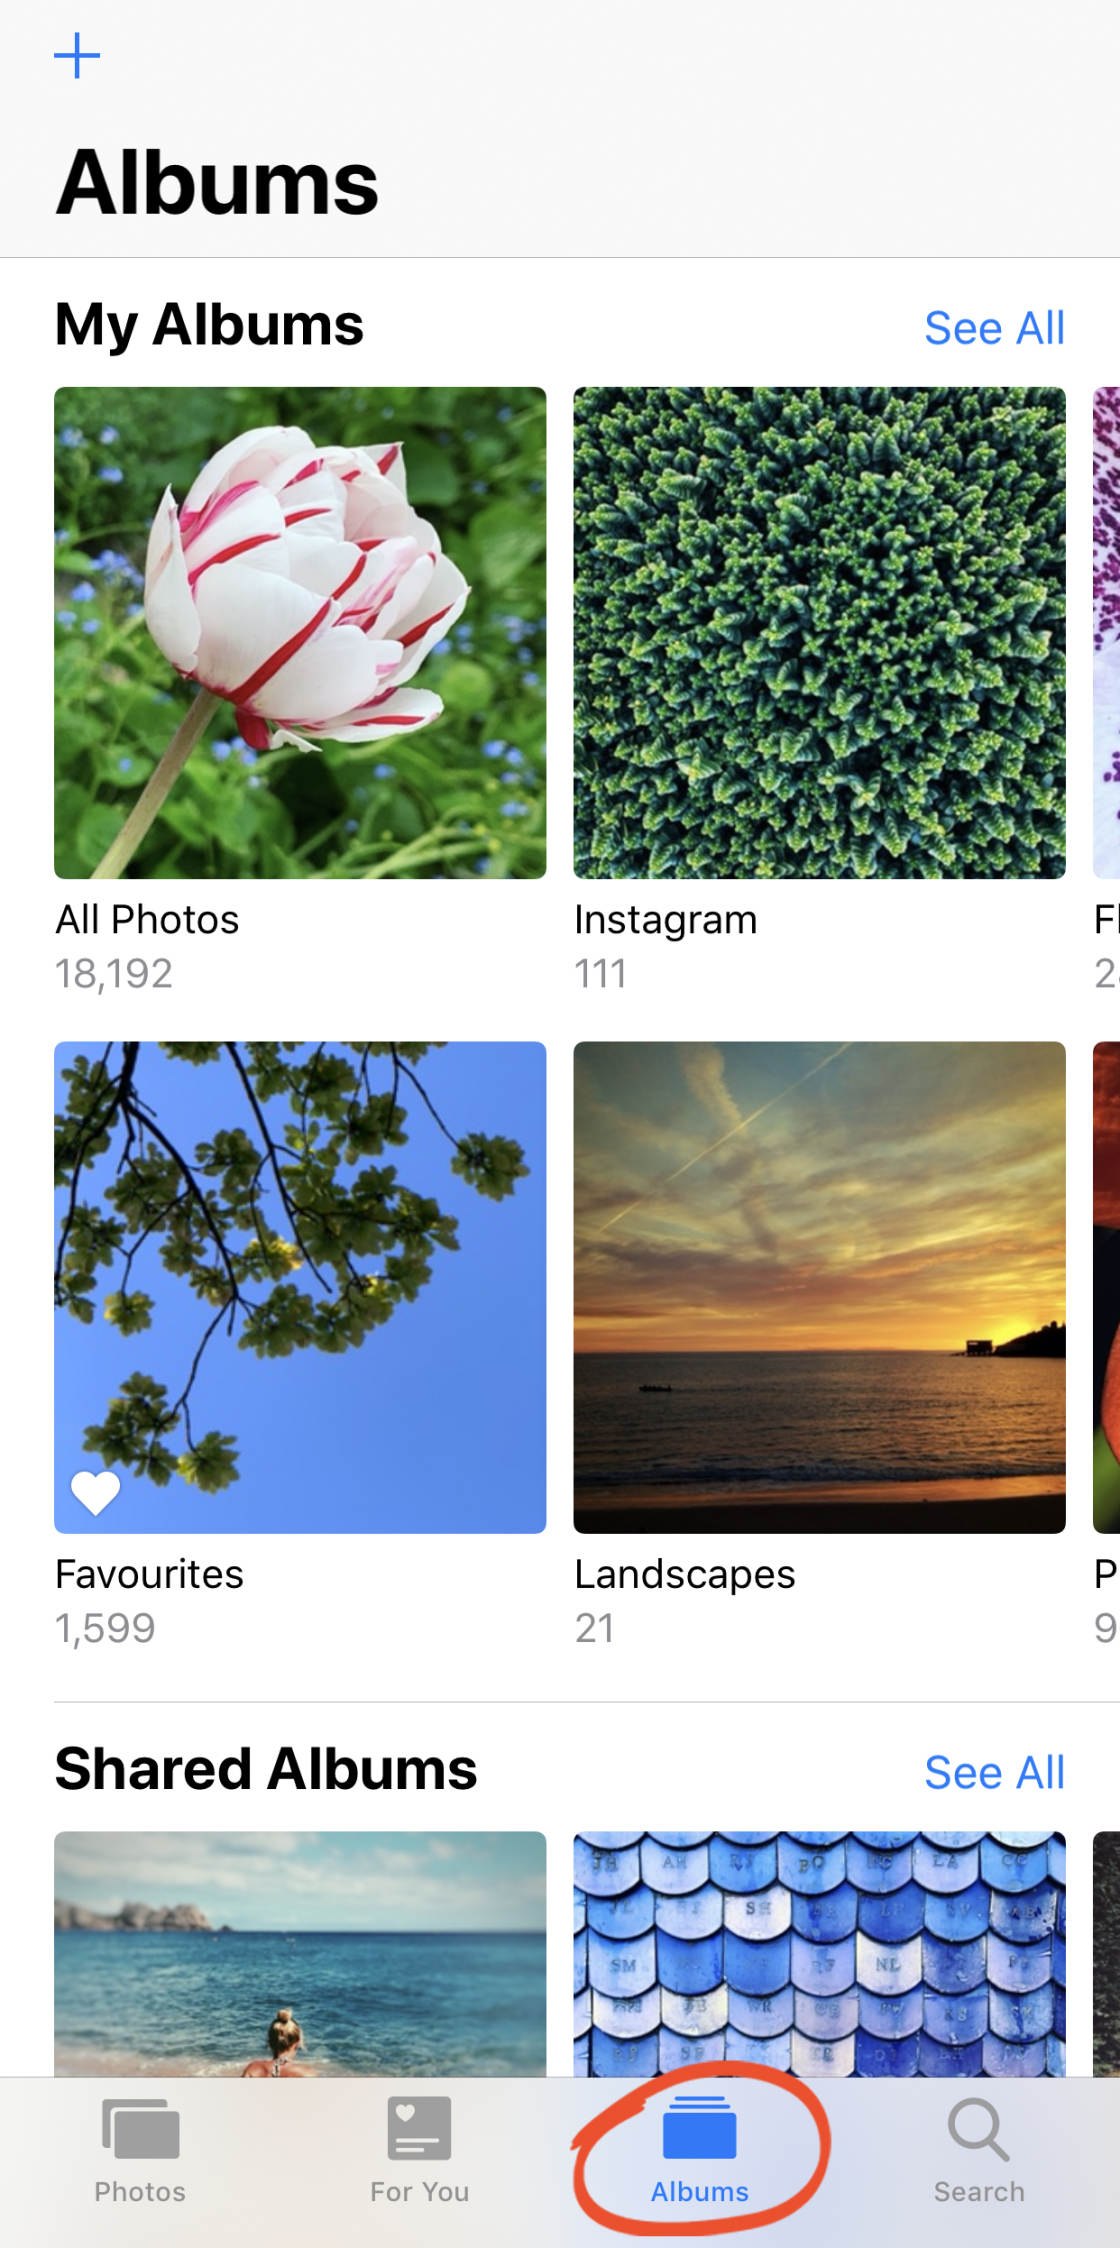
Open the Photos app on your iPhone. Tap Albums (you might need to tap it twice) at the bottom of the screen to go to the main list of albums:
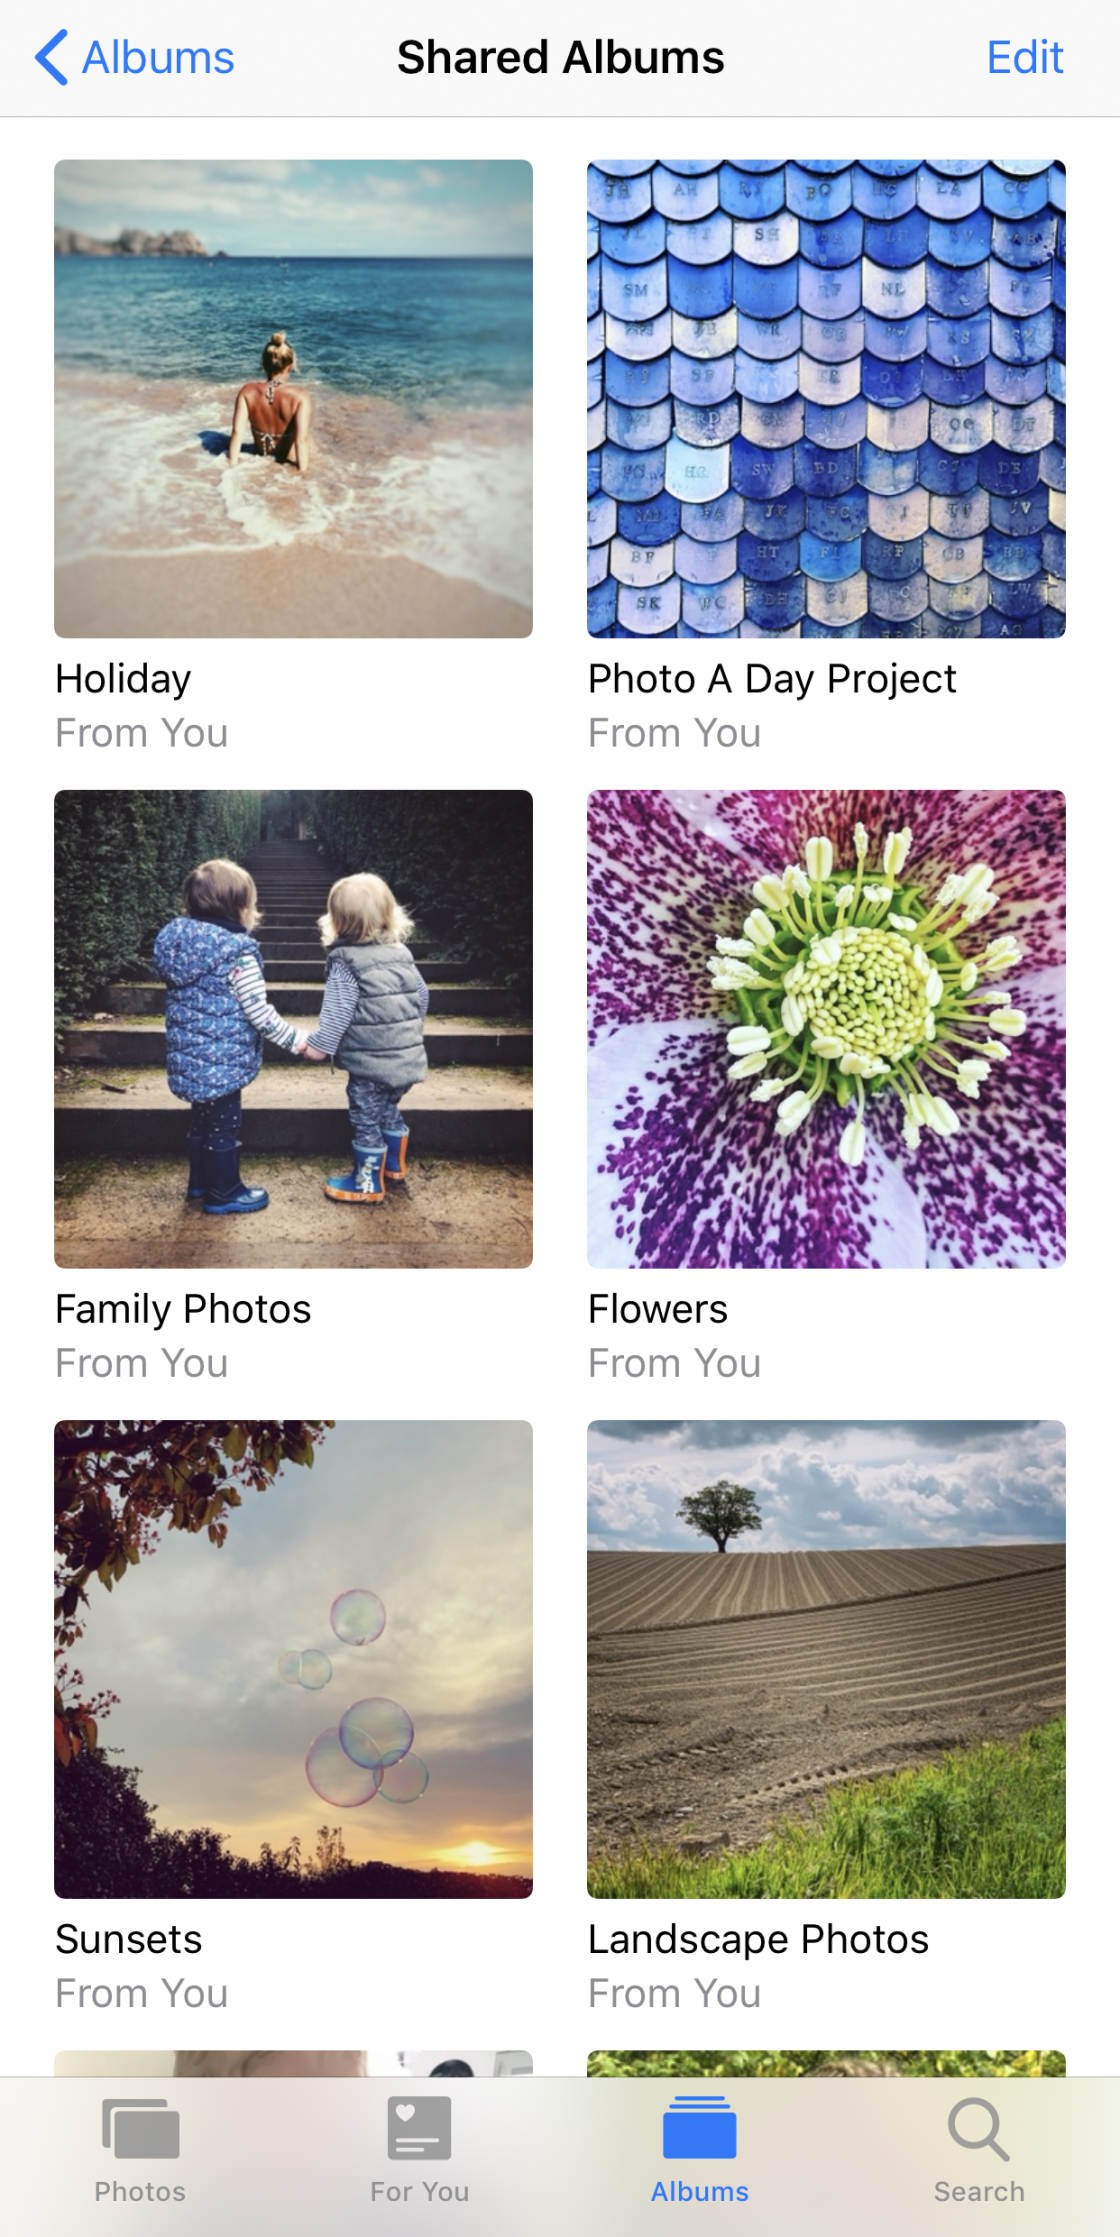
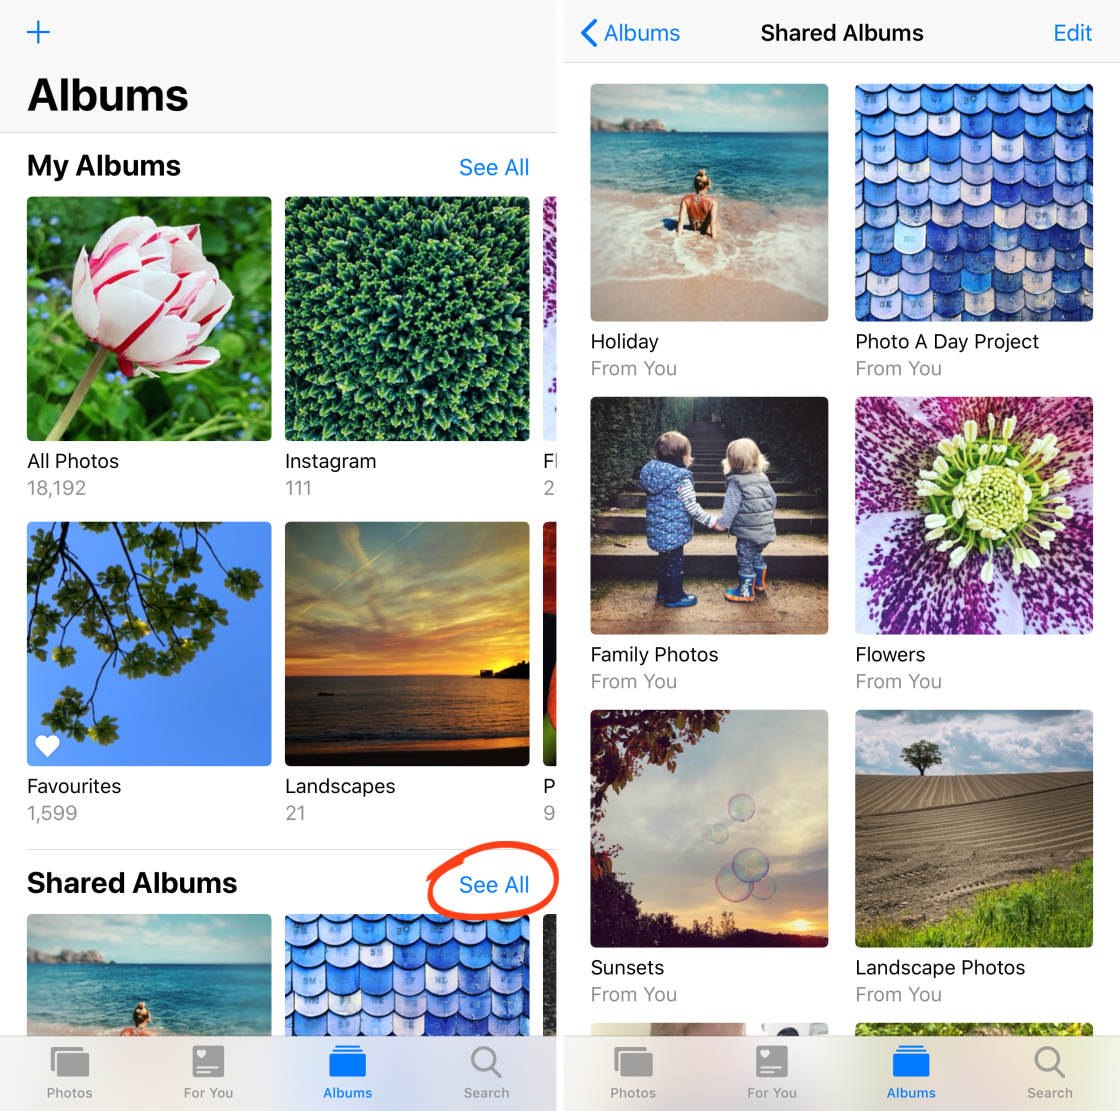
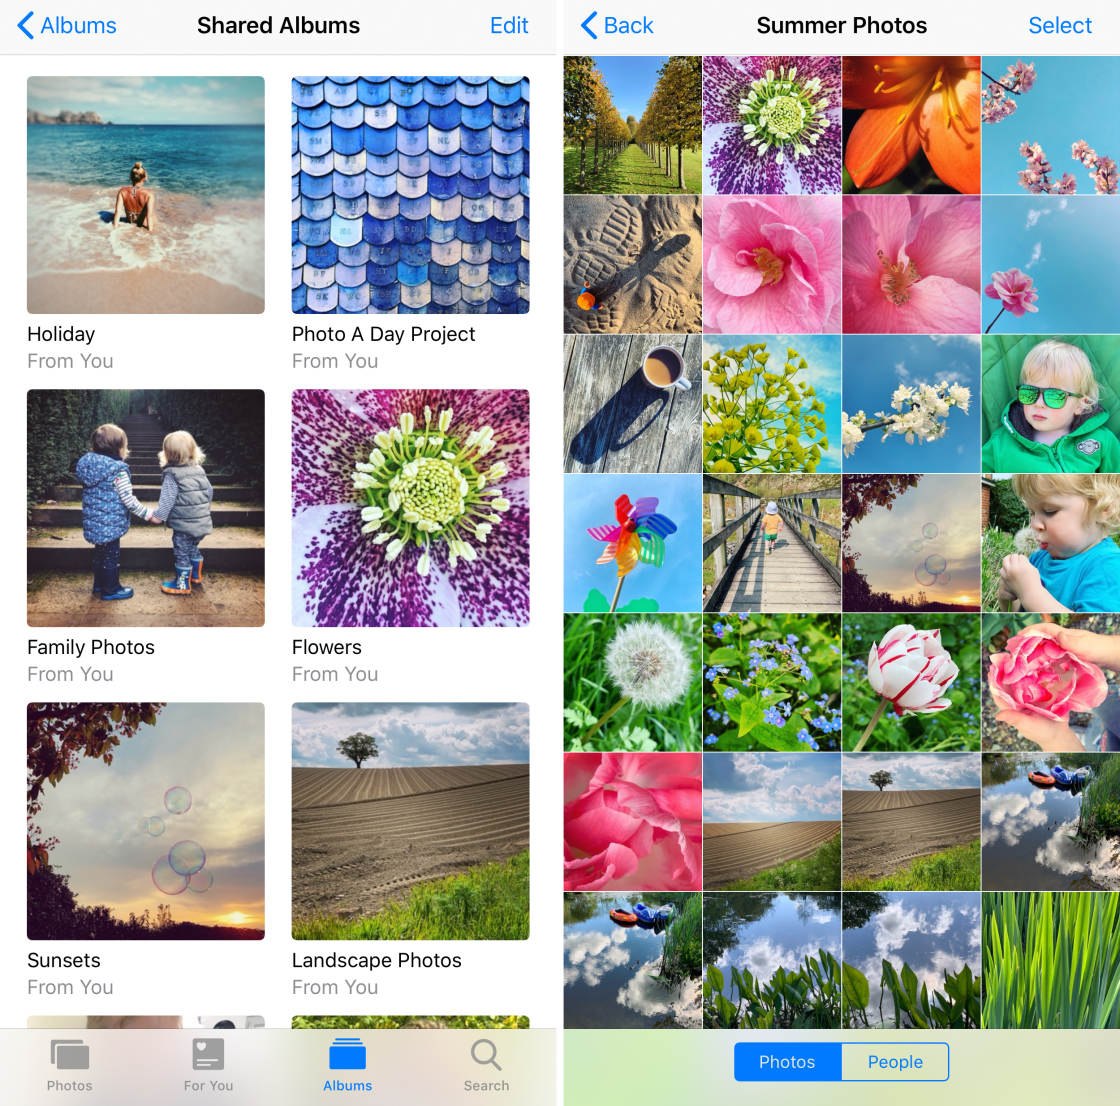
In theShared Albums section, tap See All. The Shared Albums screen will open. Here, you'll see any albums that you've shared with others or that others have shared with you:
To create a new shared album, tap Edit at the top right. Then tap the [+] icon in the top left corner:

Type a name for your shared album, then tapNext:
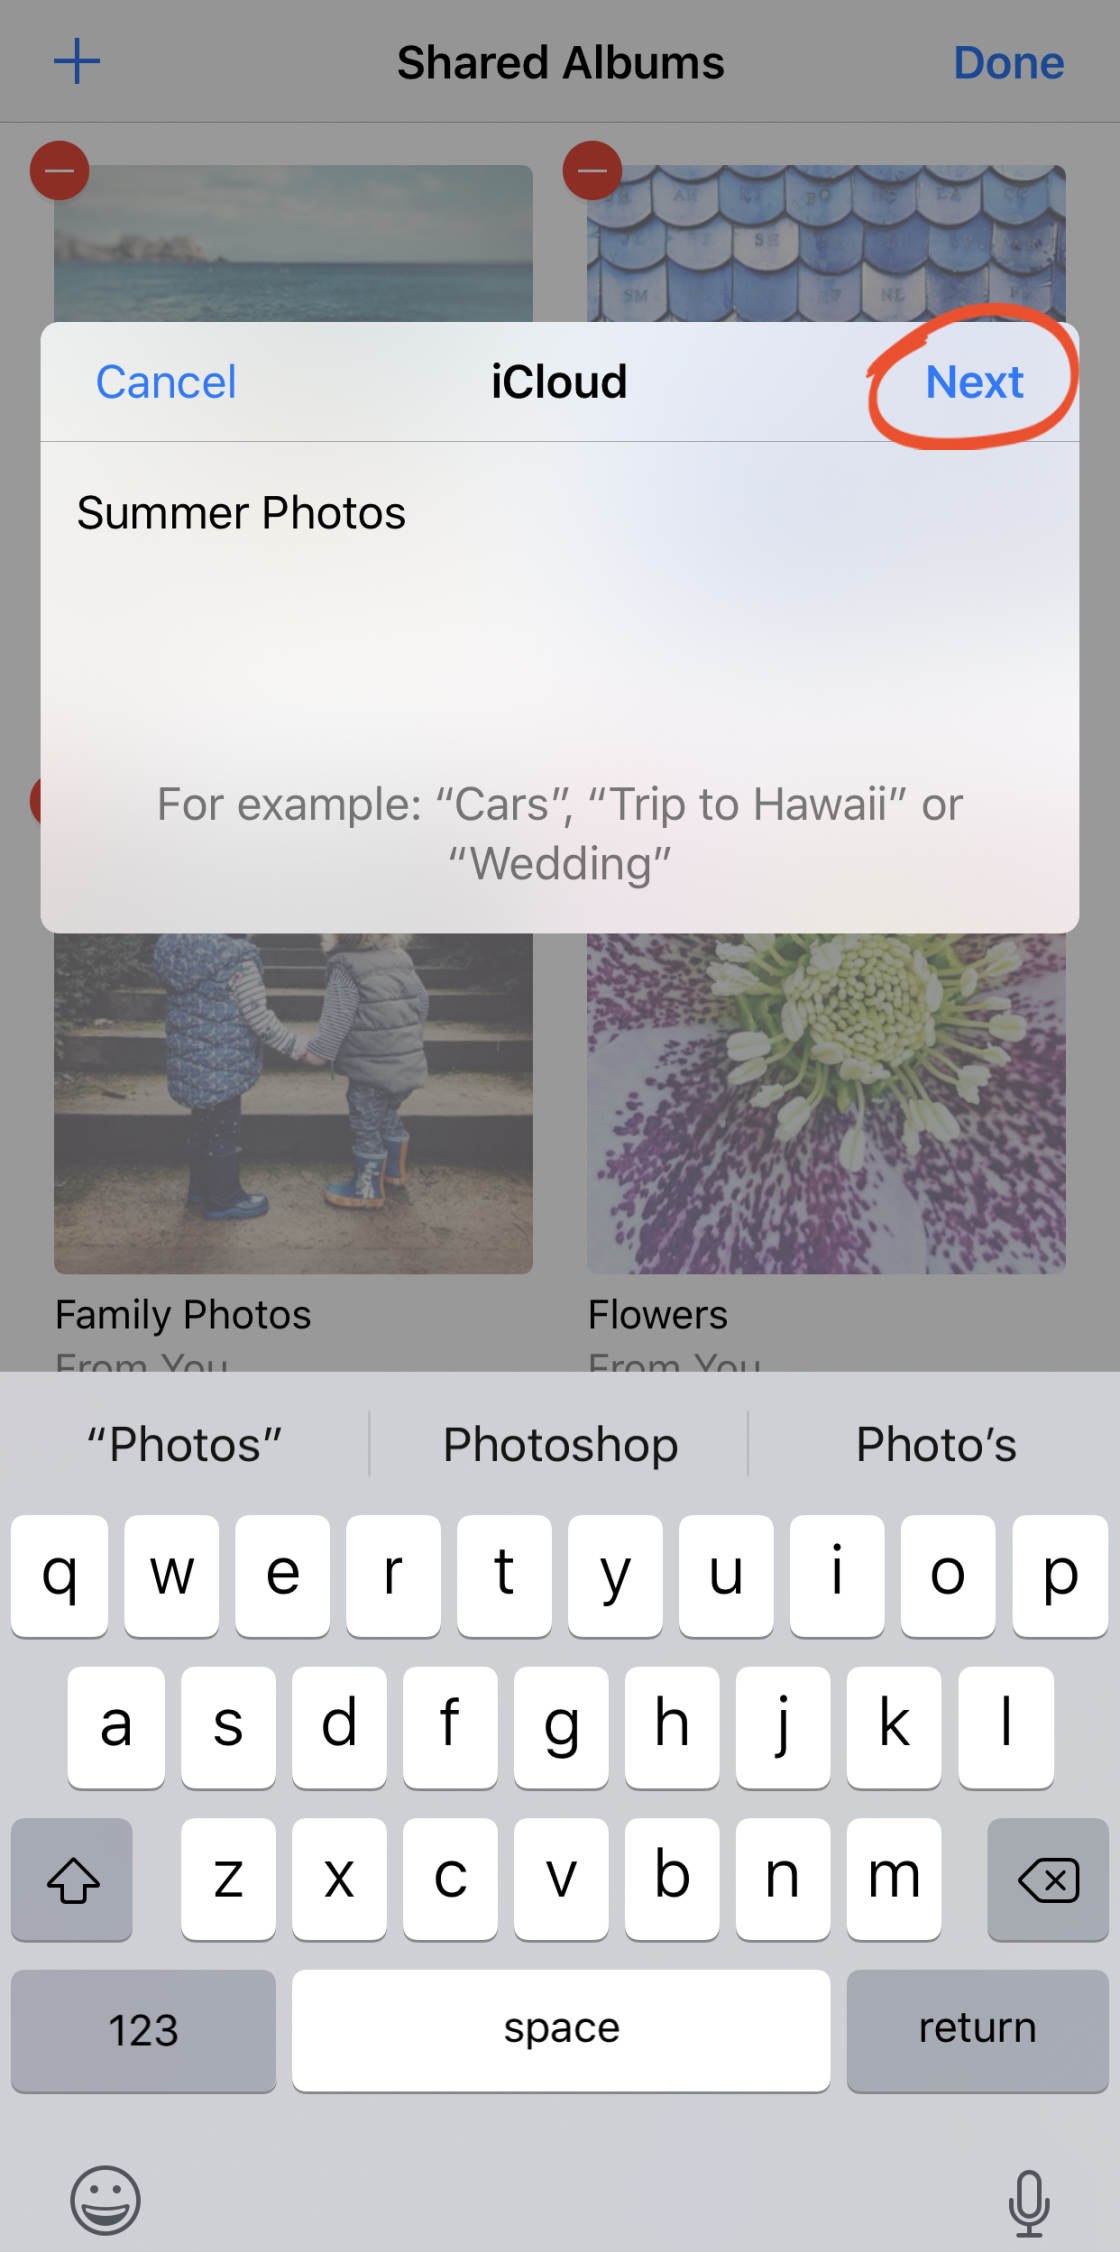
The next step is to invite people to subscribe to your shared album.
2.2 Invite People To Your Shared Album
You can now invite people to subscribe to your shared album. (You'll add photos to the album in the next step.)
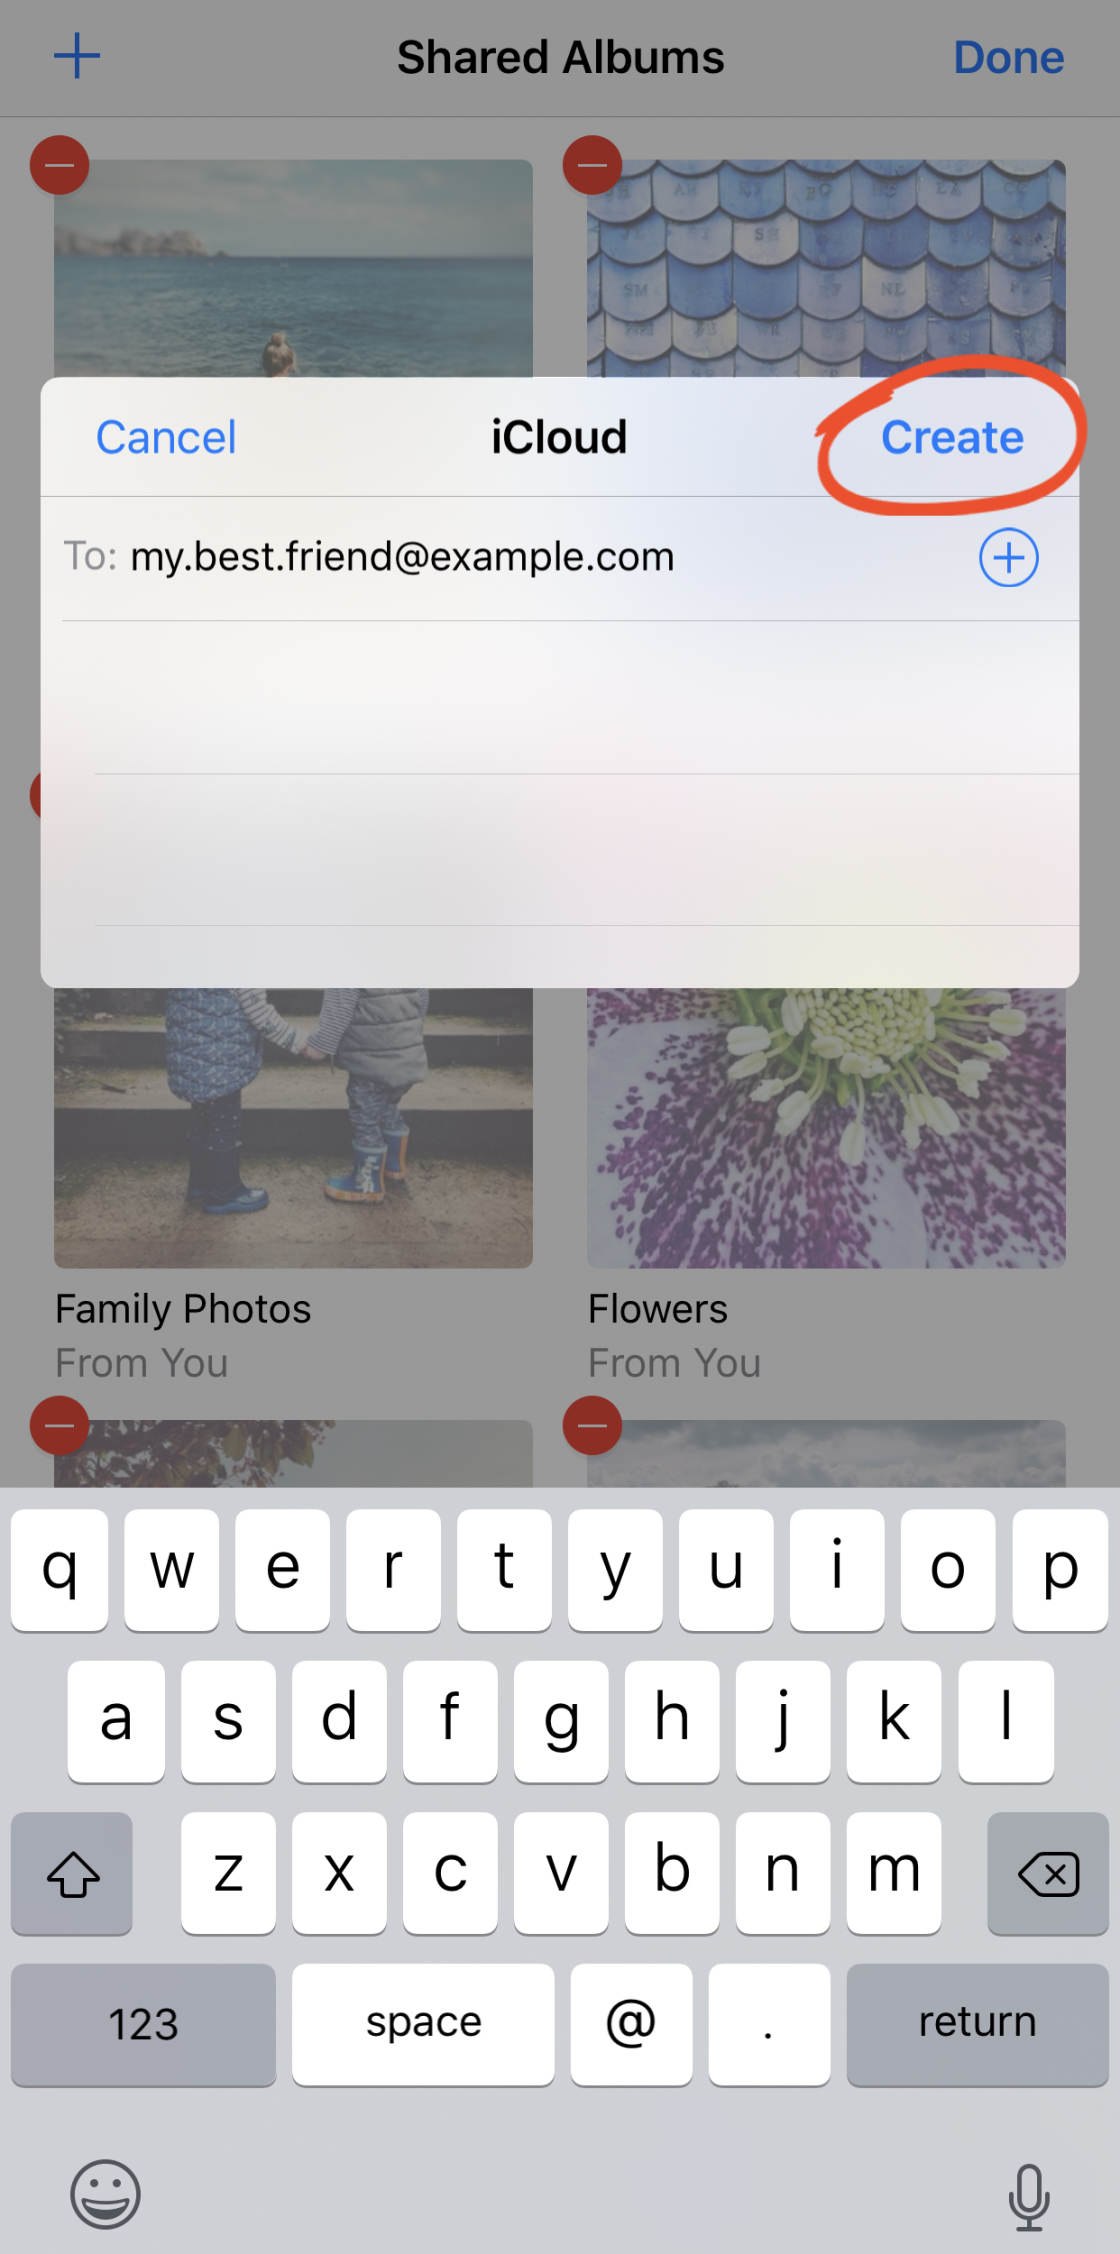
Invite people by typing their email address or iPhone number into the To box. Or tap the[+]to the right of theTobox to access your iPhone contacts list. Then tap Create:
Note that when you invite a user by email, you'll need to use their iCloud Apple ID contact information. If you're not sure which email address they use for their iCloud account, confirm with them first – otherwise they won't get the invite.
Your new shared album will appear at the top of the Shared Albums screen. TapDone at the top right:

What if you want to share albums with a non-iCloud user?
Simply create a shared album as above, but don't invite the person as a subscriber. Then open that new shared album, and tap the People tab at the bottom. Turn on Public Website:
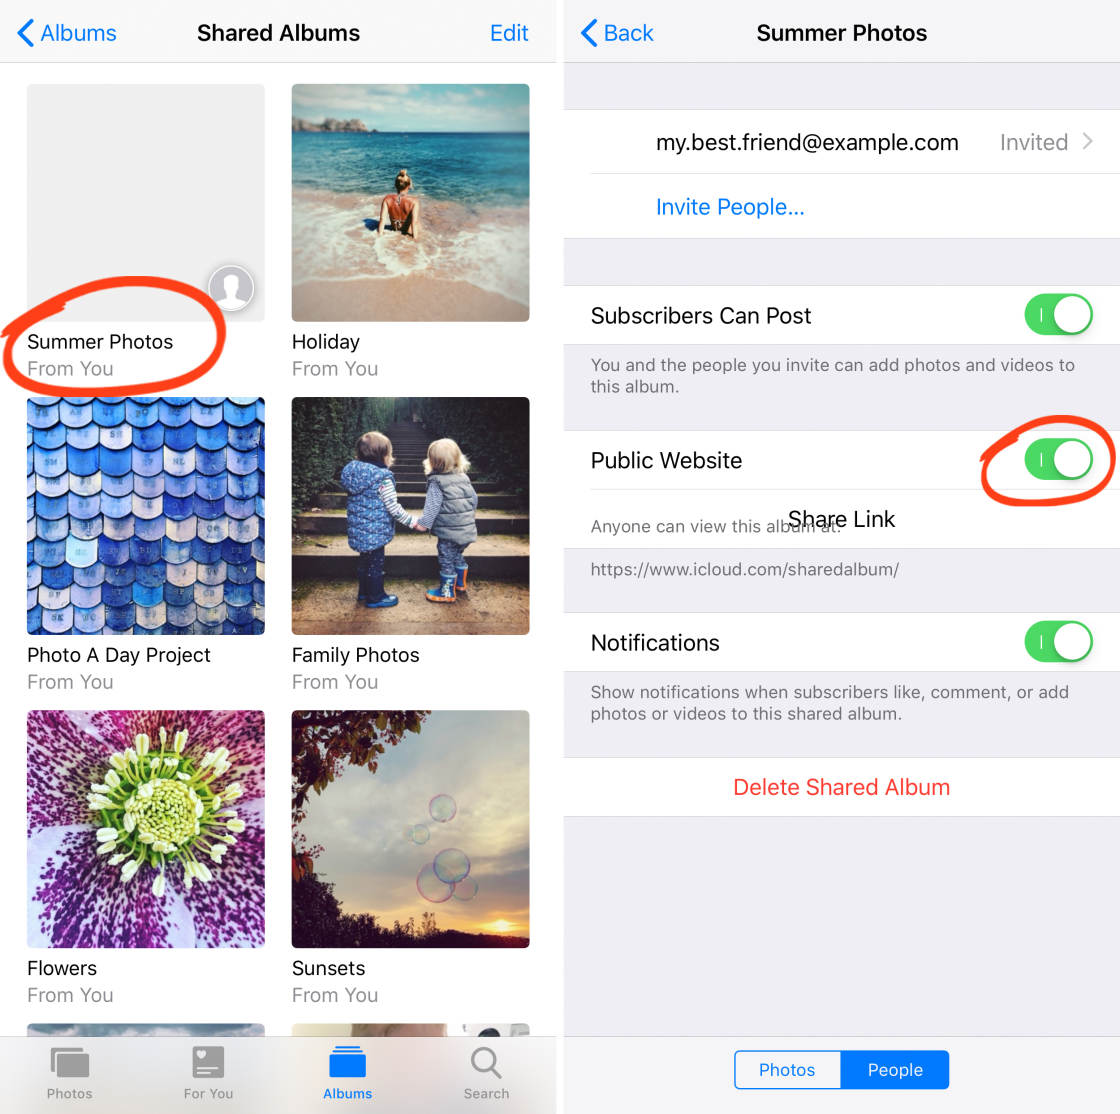
iCloud will create a link to your shared album on the iCloud.com website. Tap Share Link to share that link with anyone you want. When they click on the link, they'll be able to view your shared album.
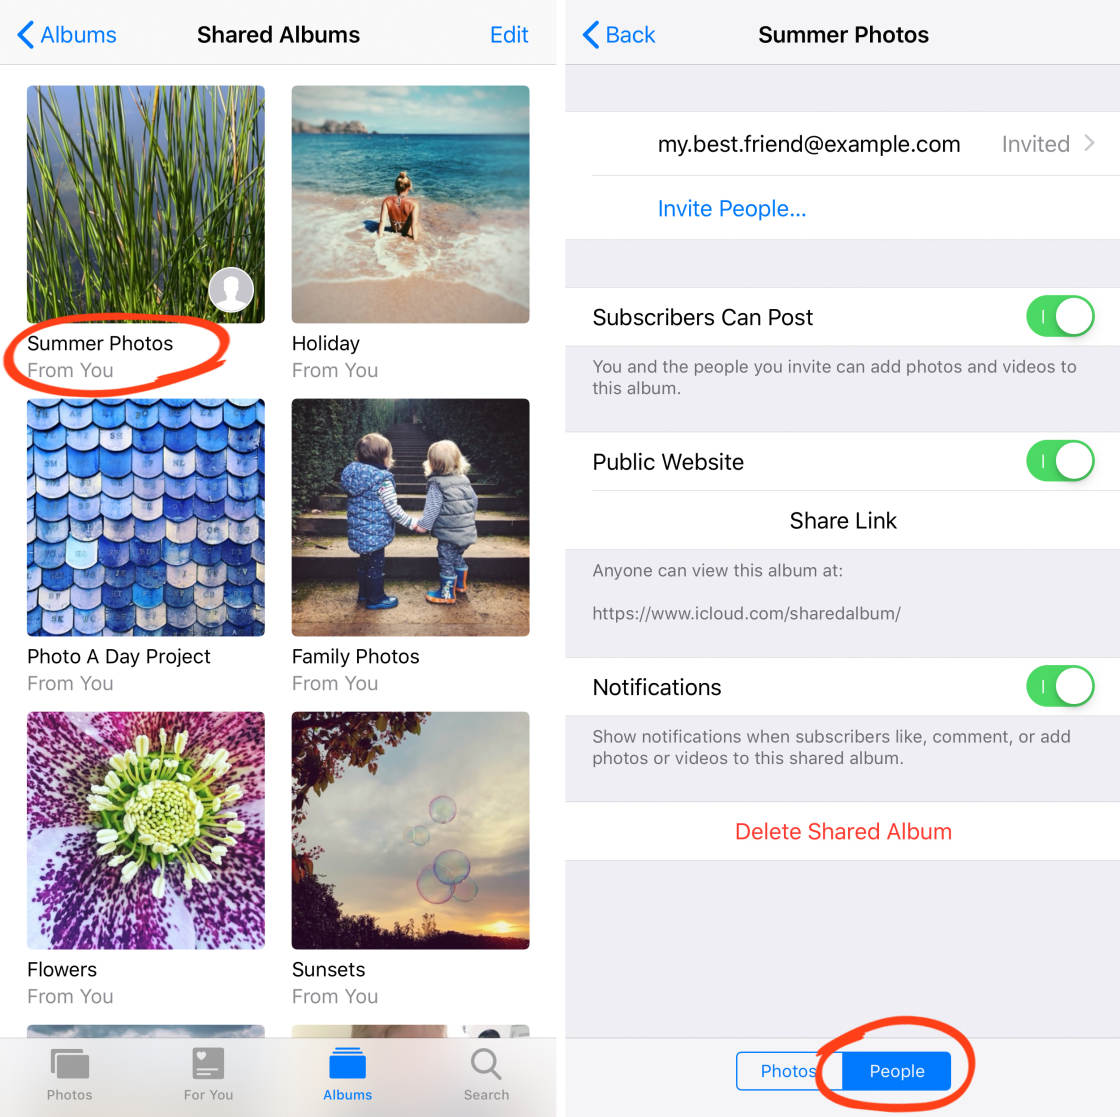
After you've created a new shared album, it's a good idea to check the settings for that album. Open the album, then tap the People tab at the bottom of the screen:
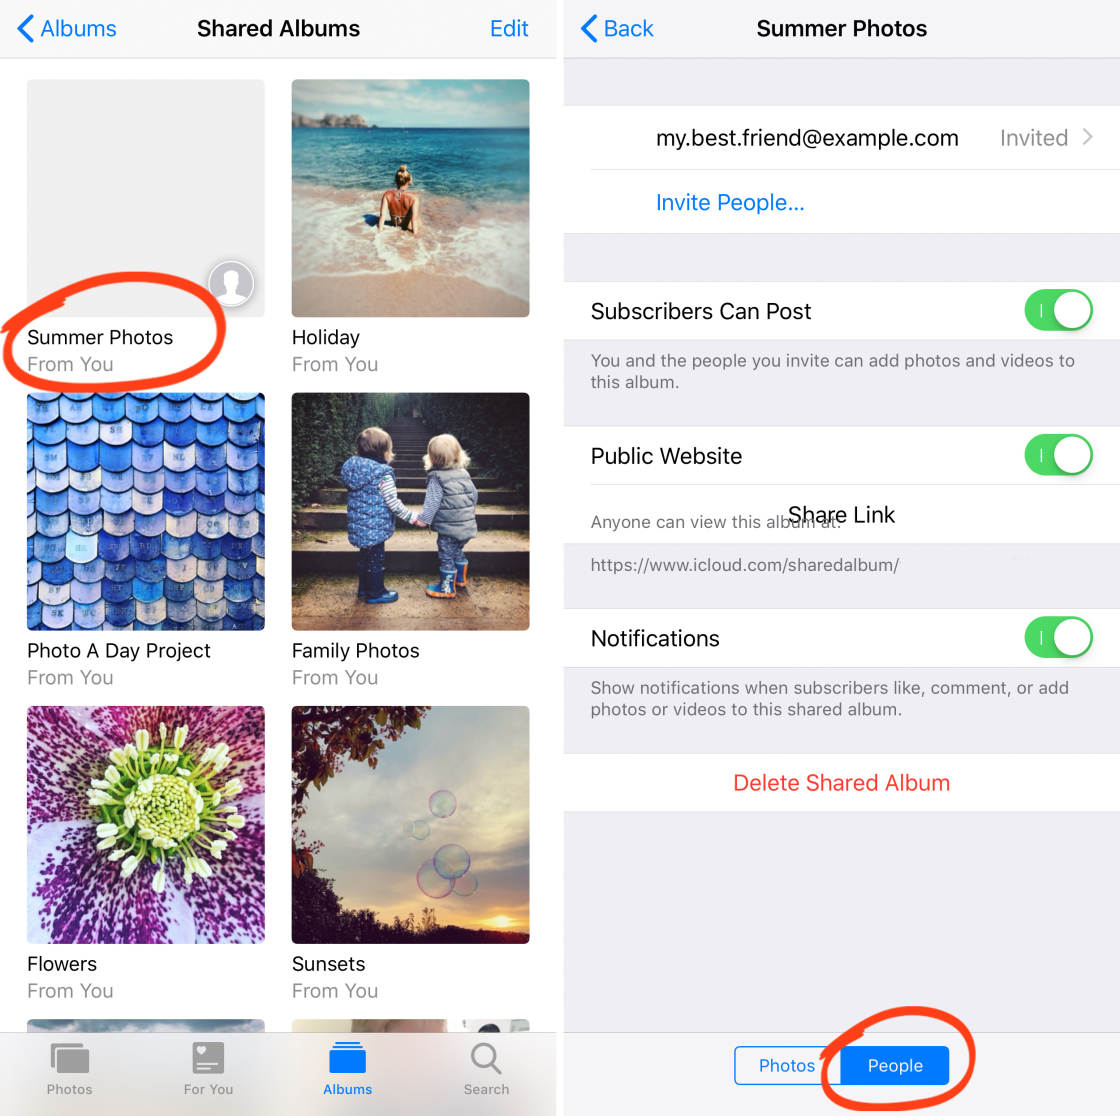
Switch on any settings that you want for this shared album. Subscribers Can Post means subscribers can add their own photos to your shared album. Notifications means you get notified when subscribers like, comment, or add photos to the album:
TabBack at the top left to return to theShared Albums screen.
2.3 Add Photos To A Shared Album
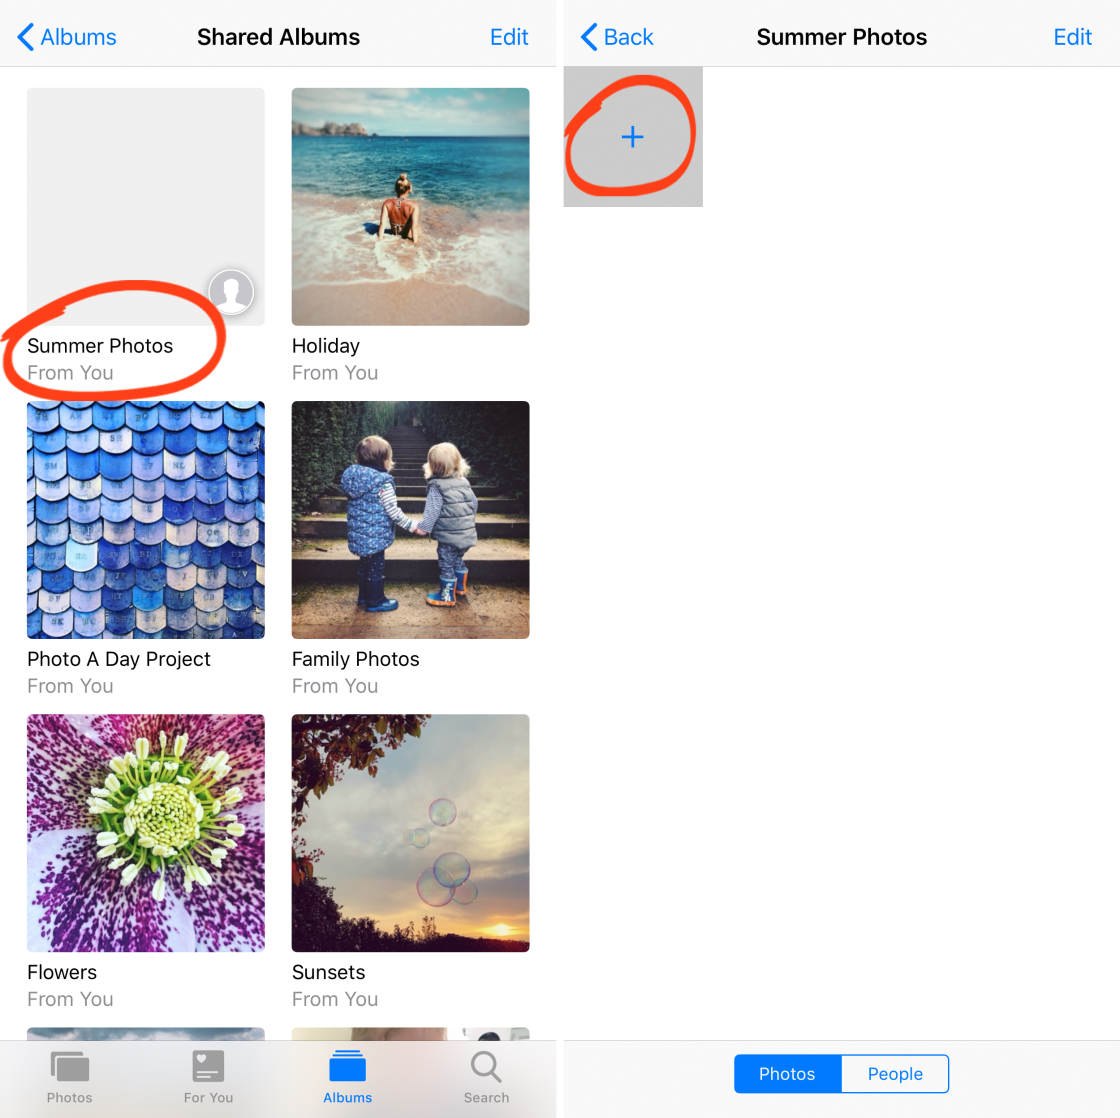
It's now time to add some photos to your shared album!
Tap on the shared album you just created. Then tap the [+] icon:
Select the photos you want to share. Then tapDone:
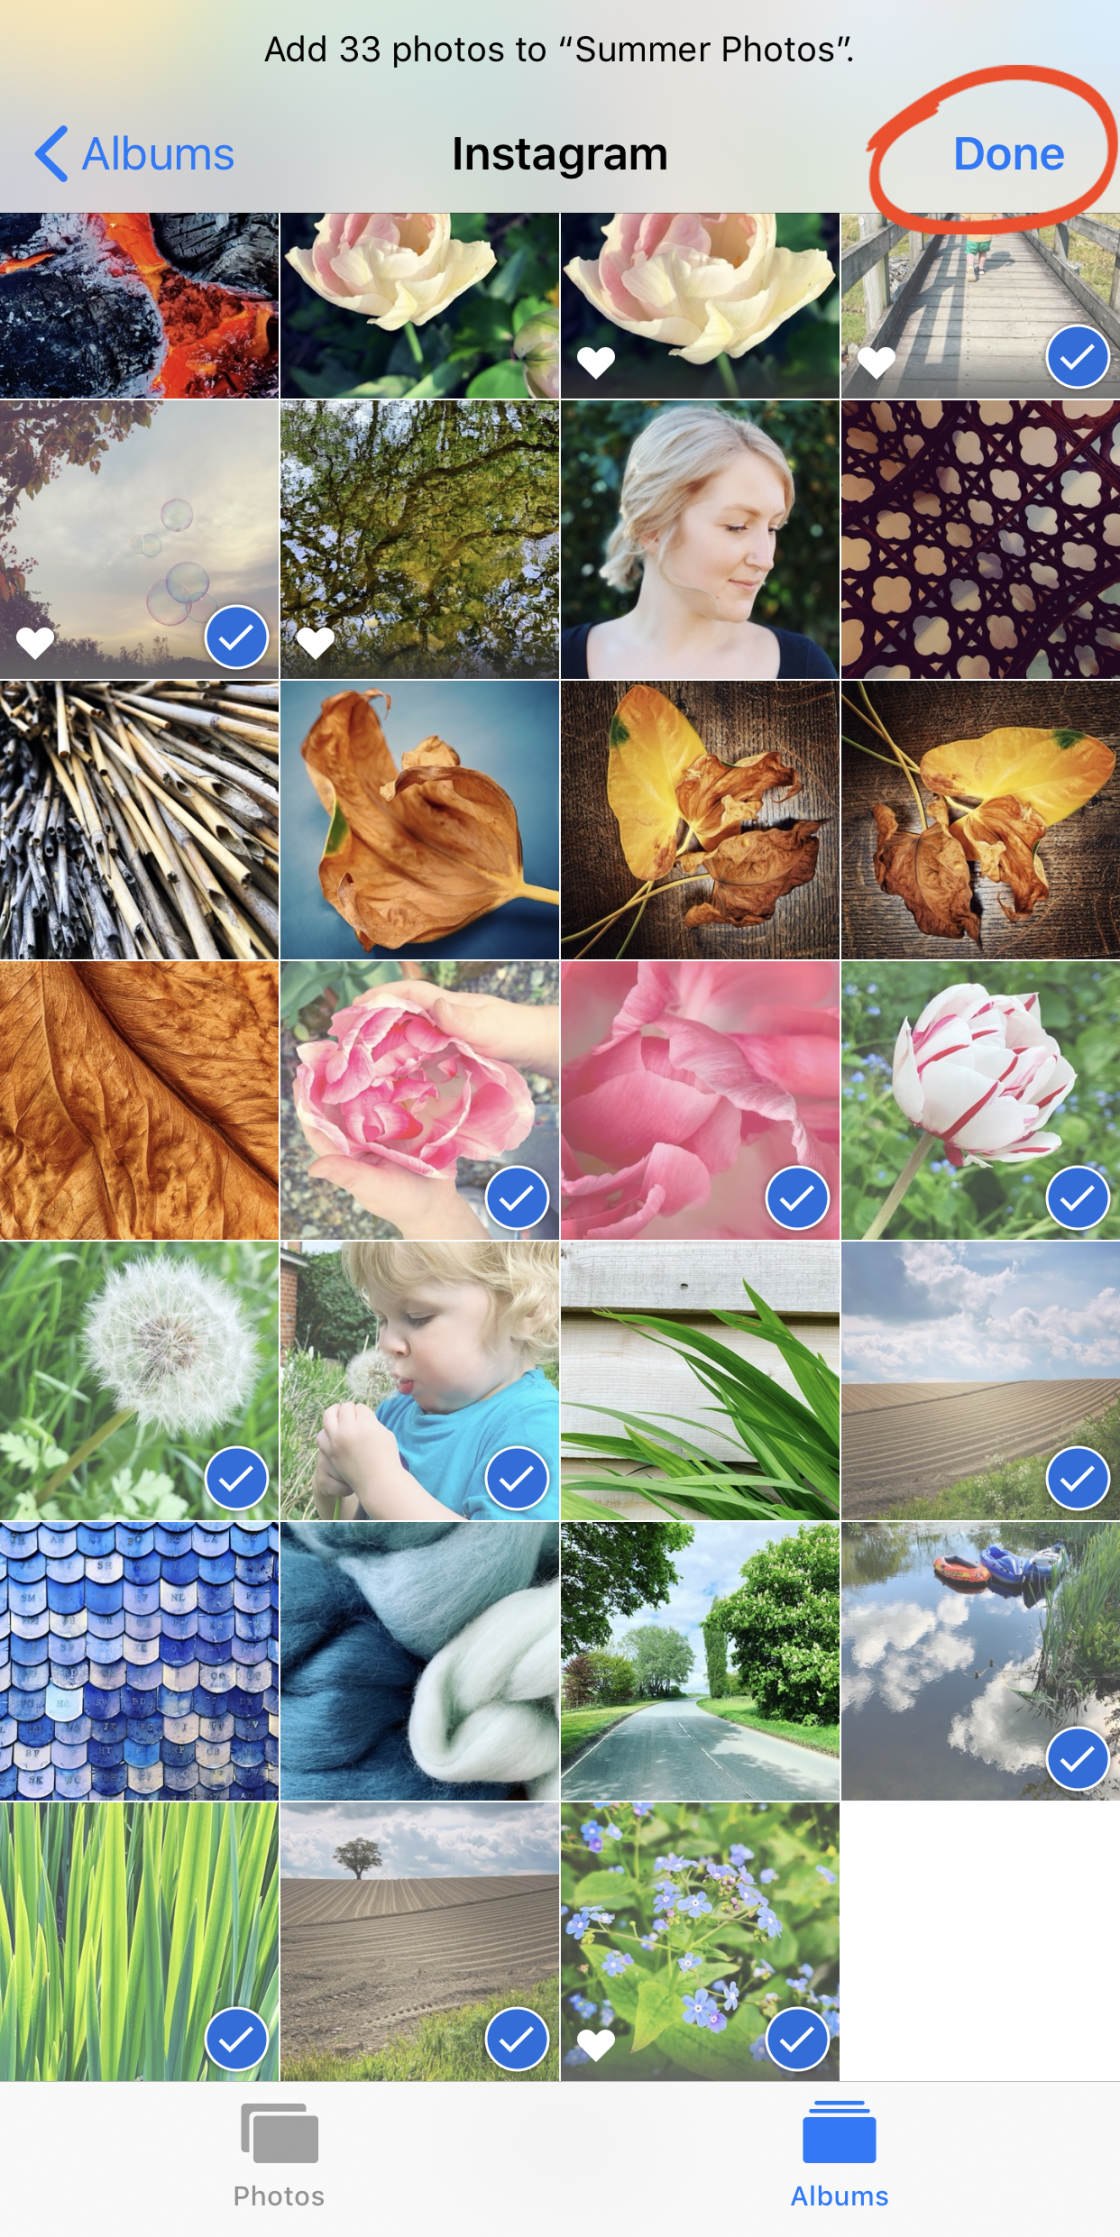
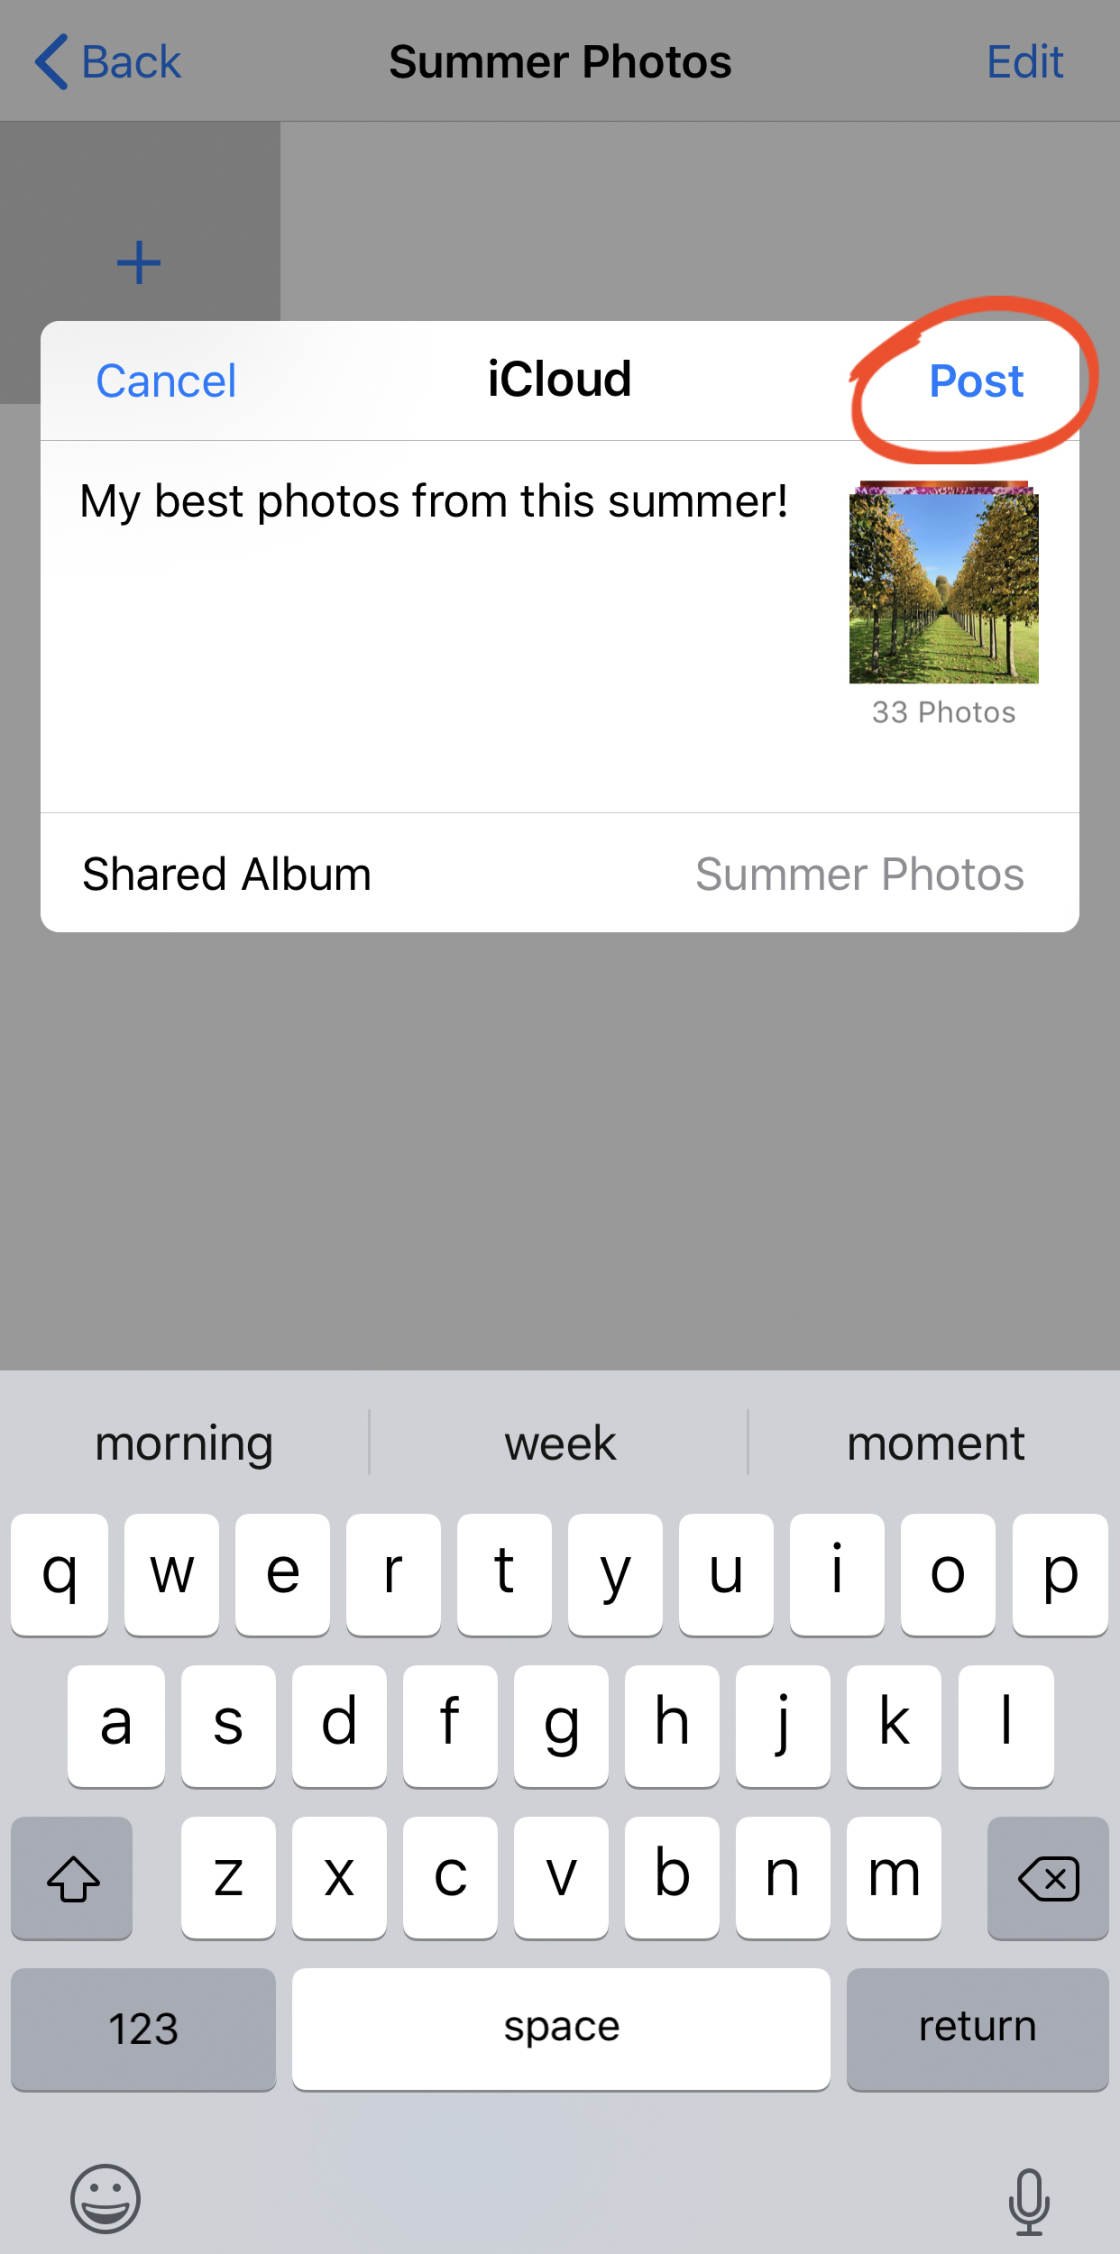
Type a comment if you wish. Then tap Post:
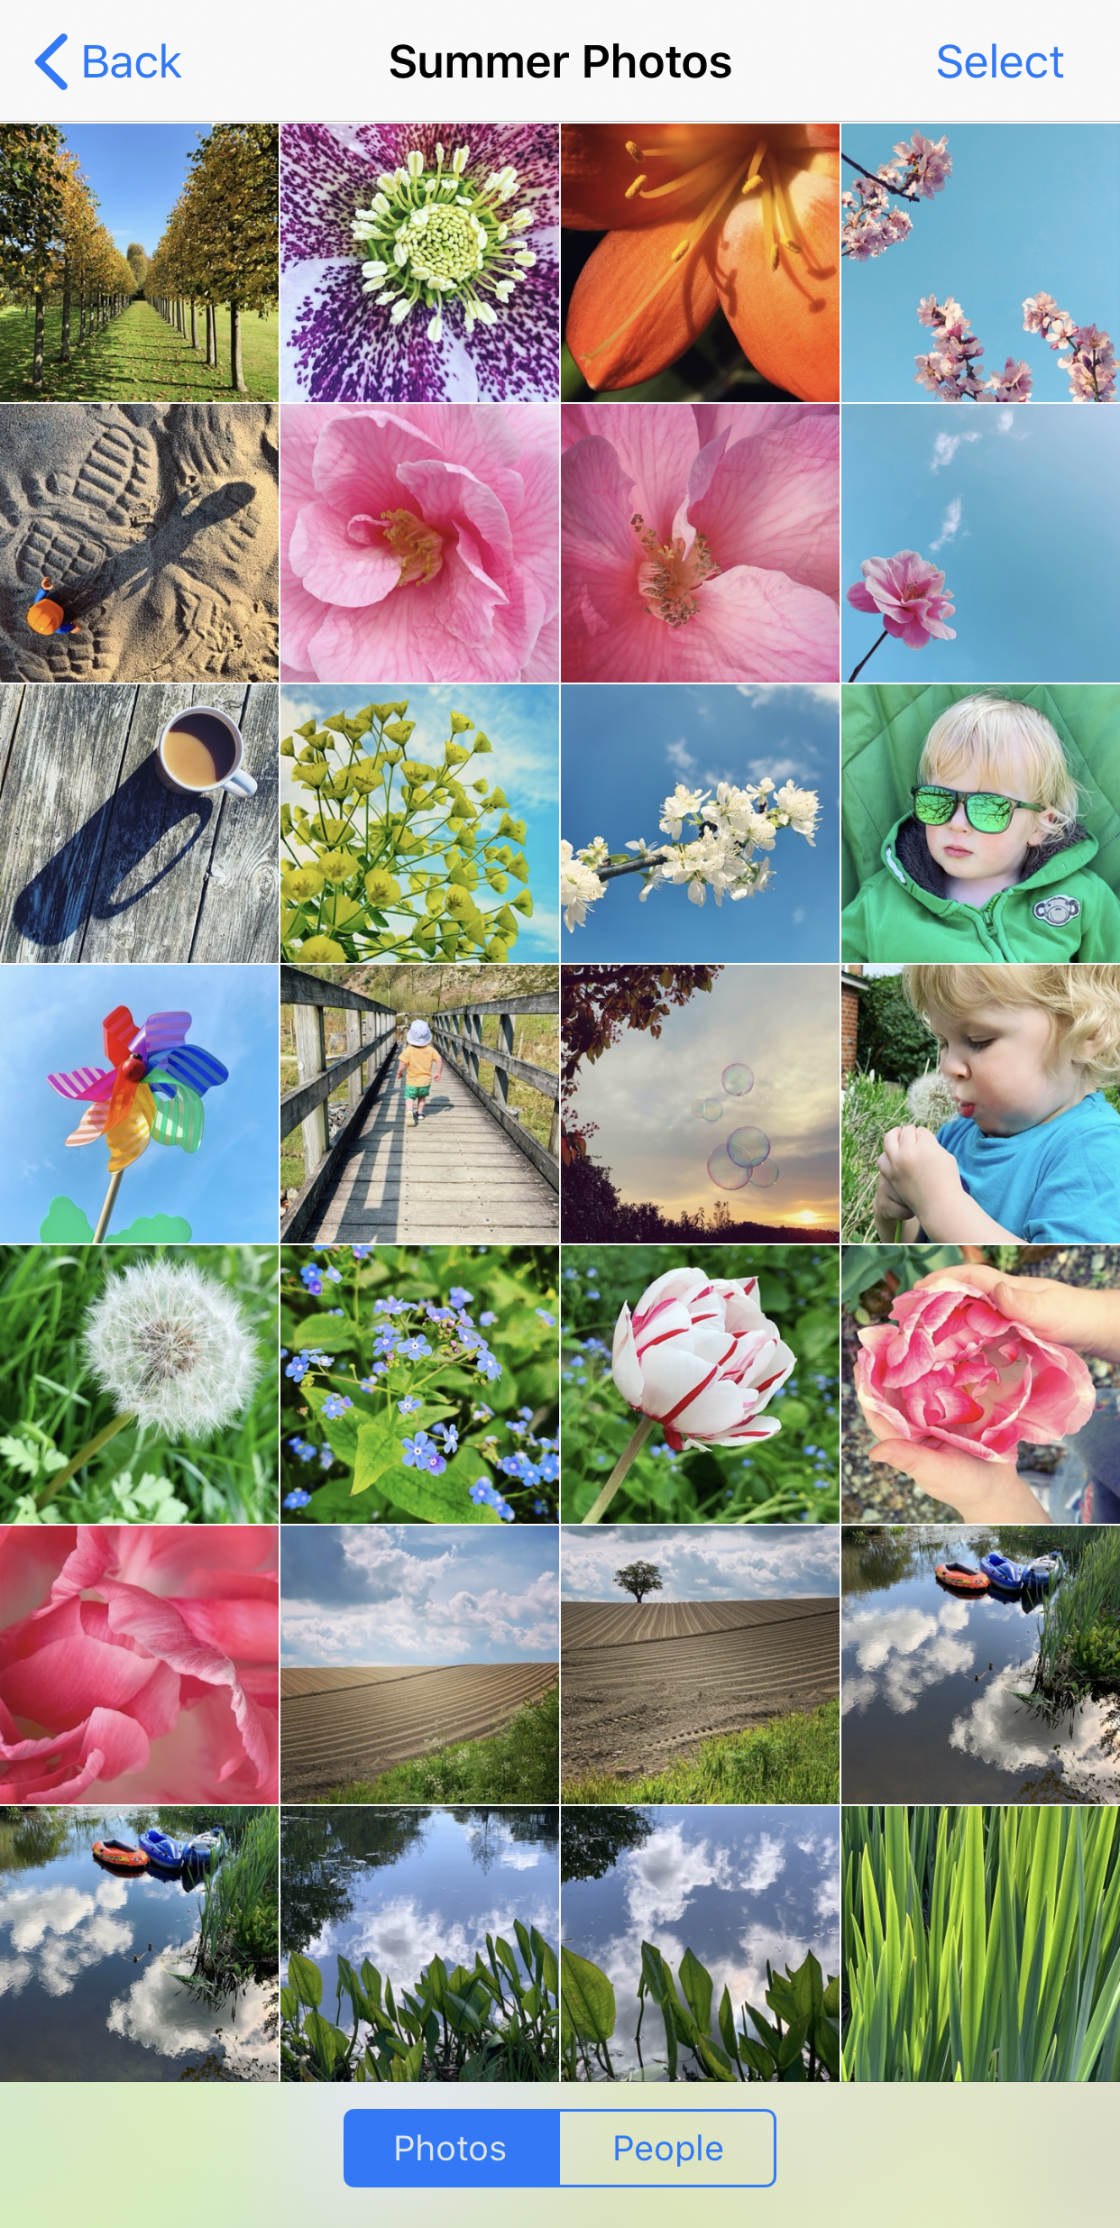
The photos will appear in your shared album. People subscribed to that album will be able to see the shared images:
To exit the shared album, tapBack at the top left.
2.4 Subscribe To A Shared Album
Has someone else invited you to subscribe to their shared album? If you want to see the photos, you'll need to accept their invitation.
When you receive a notification, accept the invitation to view the shared album.
2.5 Like & Comment On Photos
iCloud Photo Sharing allows the album creator and subscribers to like and comment on photos. Any subscribers signed in to iCloud can like and comment on the shared images.
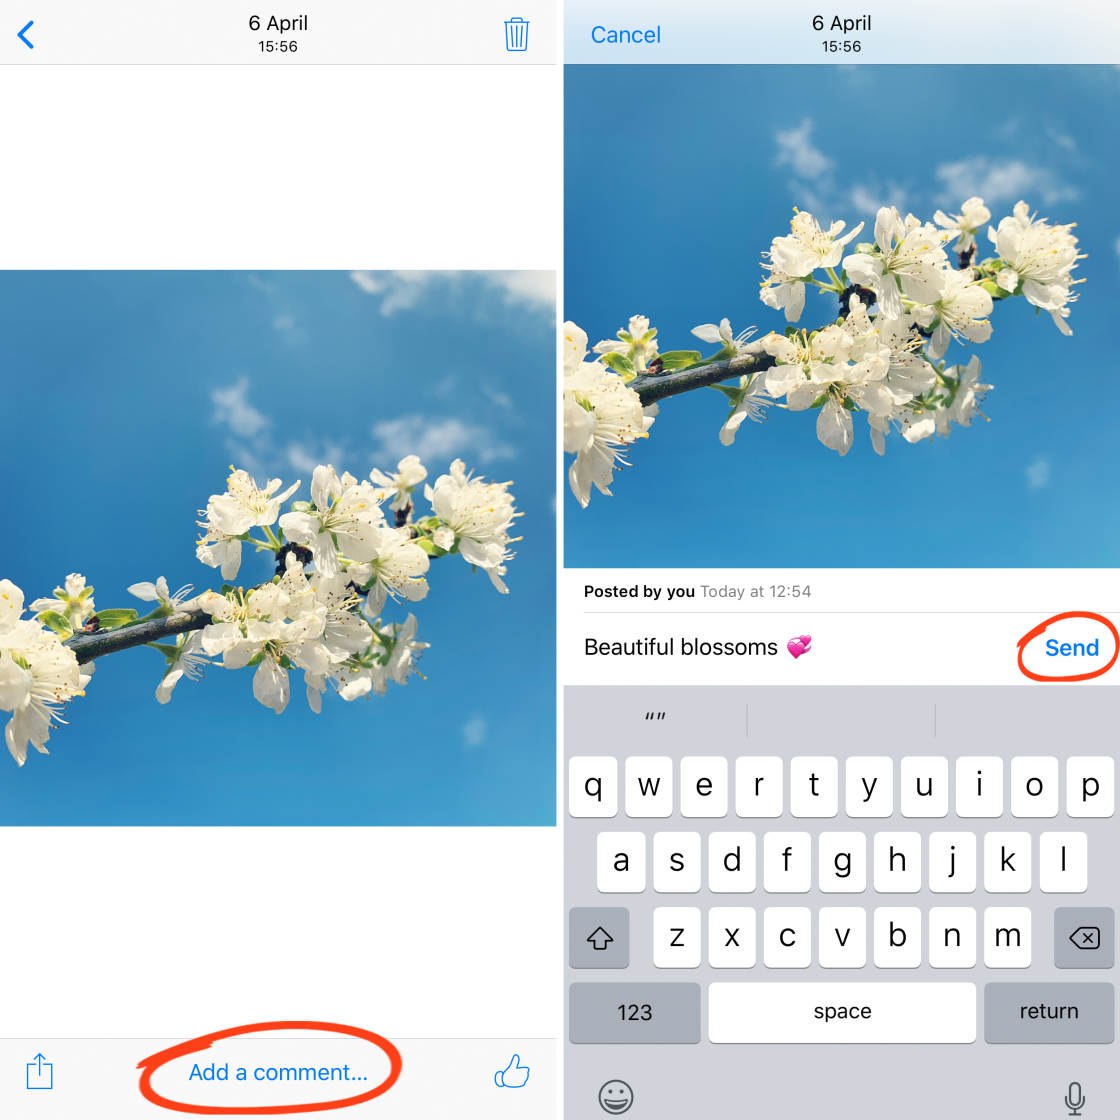
If you think a photo looks great, tap the Like (thumb) icon at the bottom right to let others know that you like it:

To comment on a photo, tap Add A Comment at the bottom of the screen. Type your comment, and tap Send:
Note that if you've already liked a photo, you'll need to scroll up to see the Add A Comment option.
2.6 Save Photos From A Shared Album
If someone adds a photo to a shared album, you can save it to the Photos app on your own iPhone.
Here's how to download photos from iCloud shared album to your device:
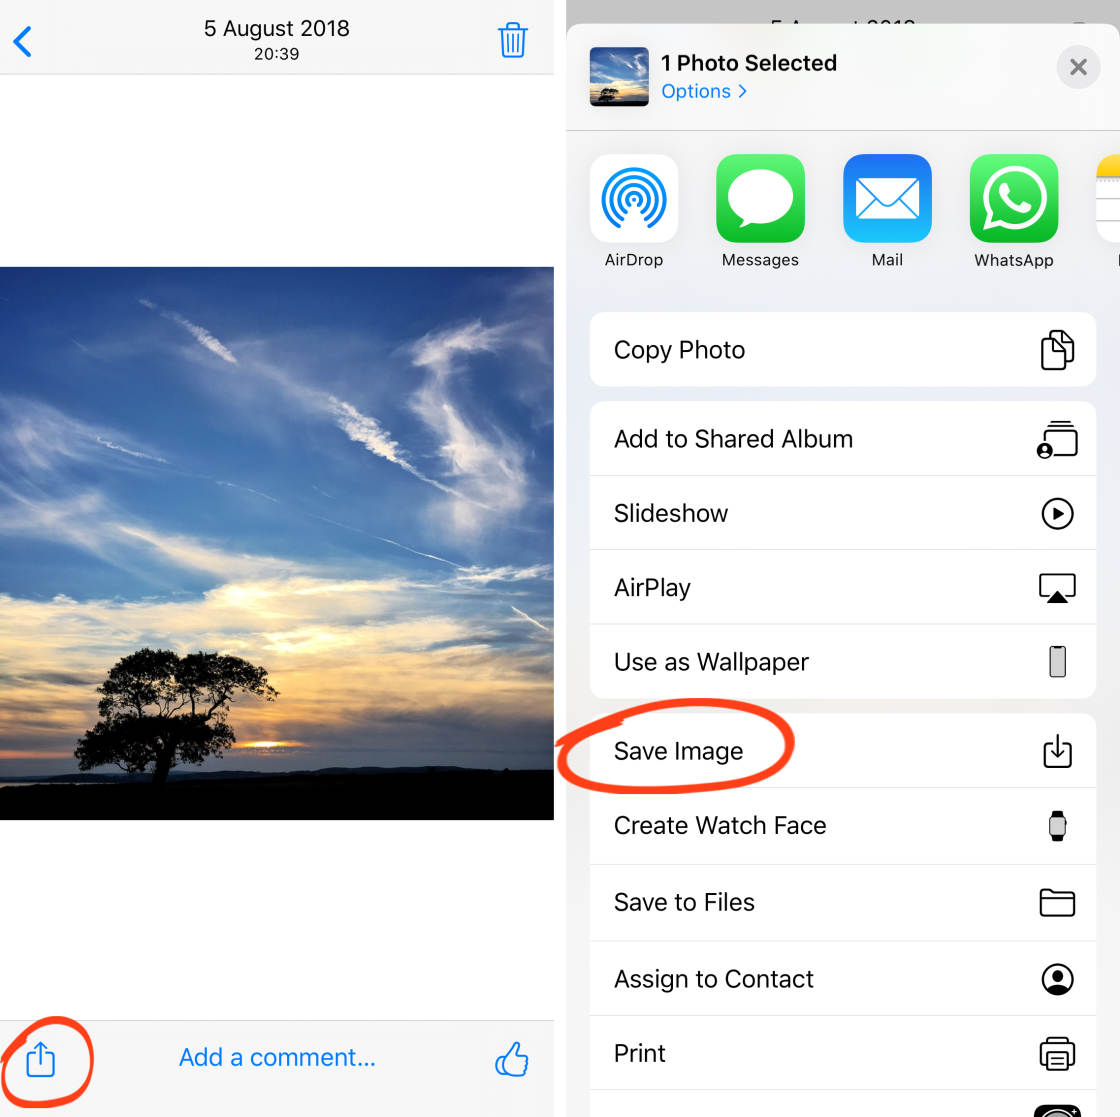
Select the photo you want to save, and tap the Share icon (square with up arrow). Scroll down, then tap Save Image:
The photo will now be stored on your iPhone as well as in the shared iCloud album.
If the owner of the photo deletes it from the shared album, you'll still have the image in the Photos app on your iPhone.
Other users can save your photos to their iPhone by following the same steps.
2.7 Delete Photos From A Shared Album
If you no longer want to share a photo, you can delete it from the shared album.
Select the image you want to delete. Tap the Delete (trash) icon at the top right. Then tap Delete Photo:
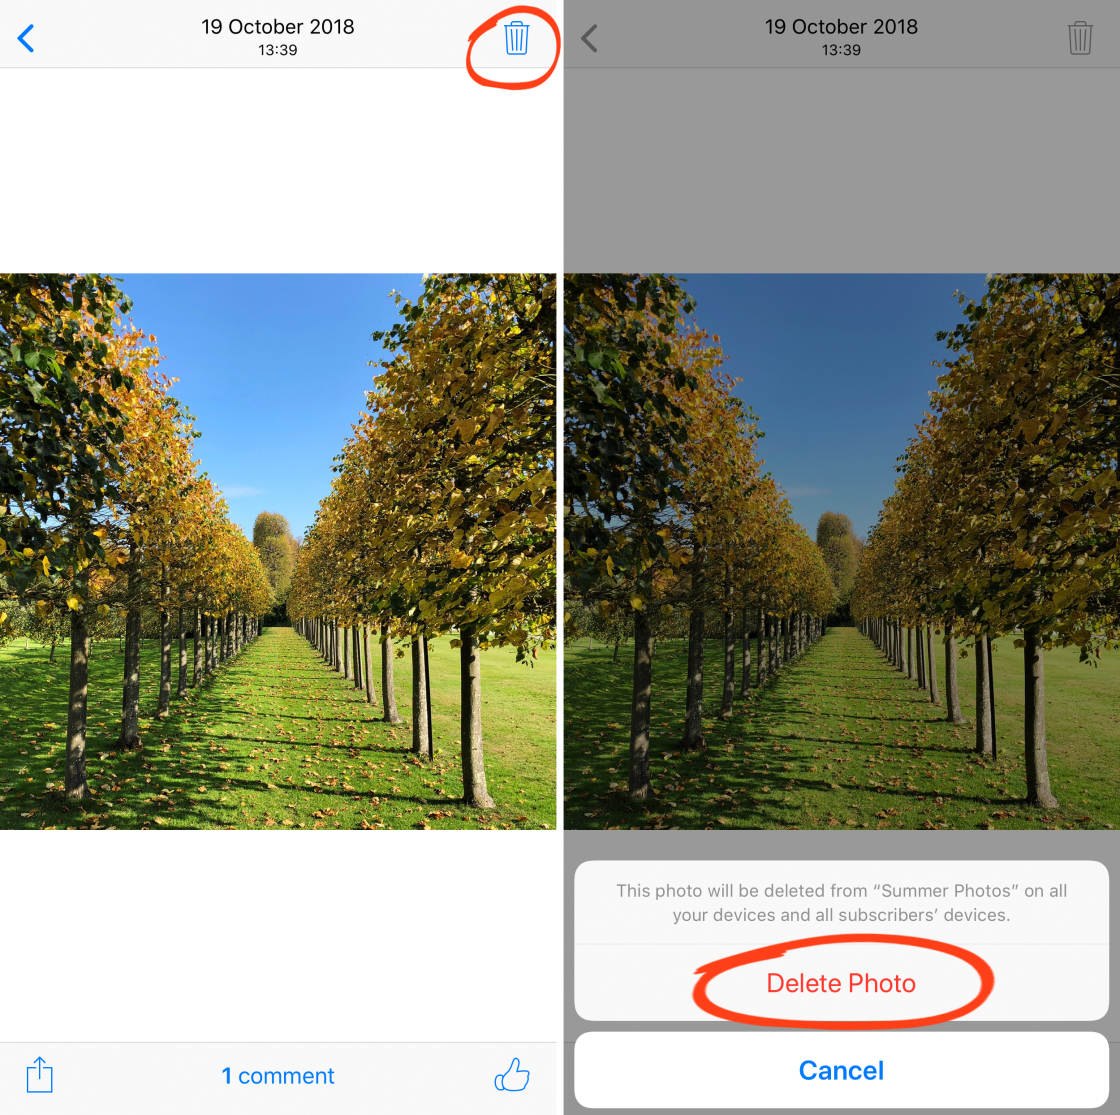
When you delete a photo, it gets deleted from the shared album on all your devices and all subscribers' devices. But it doesn't get deleted from its original location in the Photos app on your iPhone.
2.8 Remove A Subscriber From A Shared Album
Do you want to remove a subscriber from your shared album?
Open the shared album, then tap the People tab at the bottom of the screen. Subscribers' contact details are at the top of the screen:
Tap on the subscriber you wish to remove. At the bottom of the screen, tap Remove Subscriber, then tapRemove.
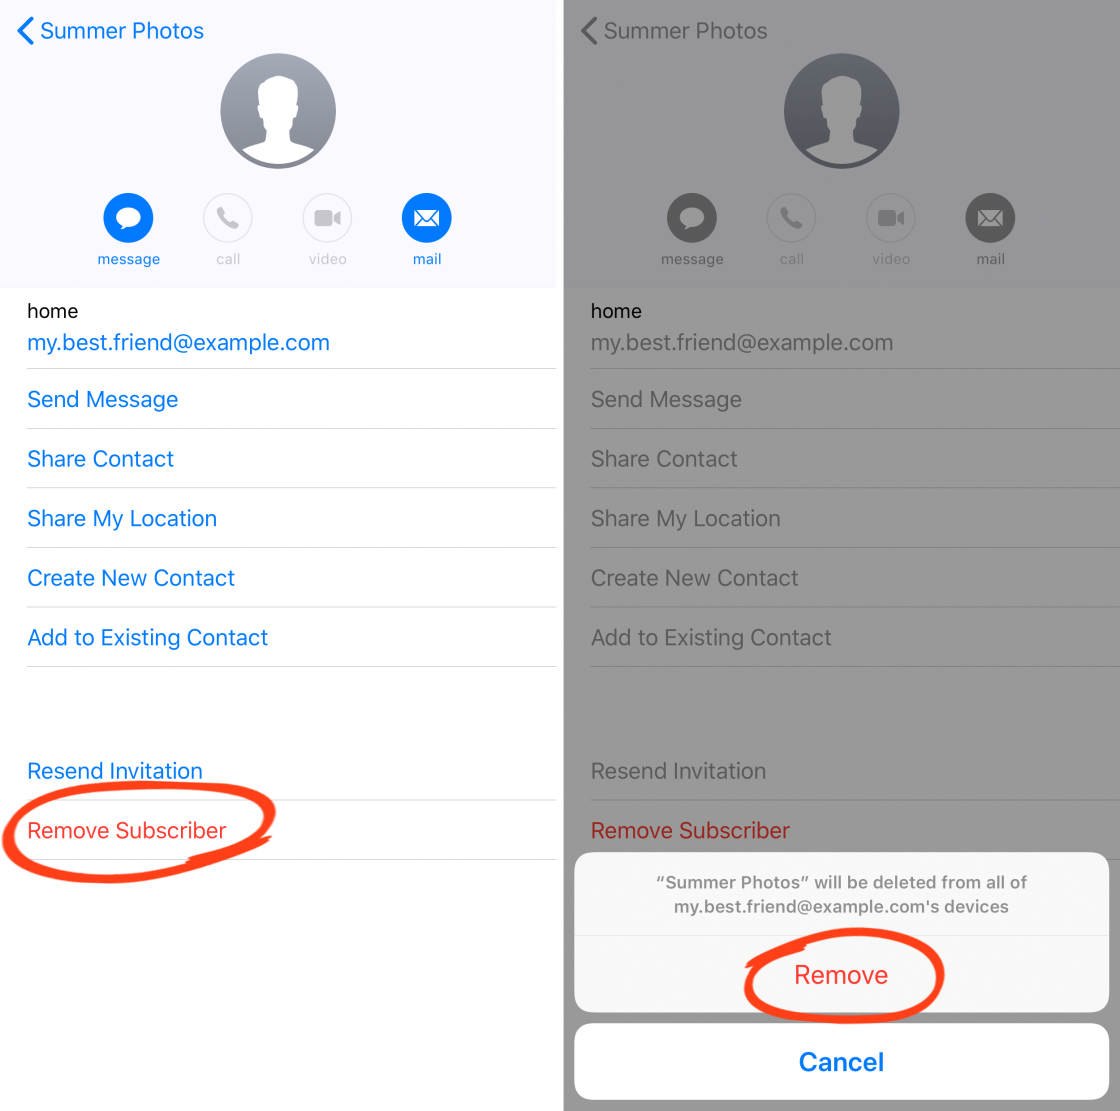
That person will no longer have access to the shared album.
2.9 Delete A Shared Album
Do you want to delete a shared album that you created?
On the Shared Albums screen, tap Edit at the top right. Tap thered circle on the album you want to delete, then tapDelete:
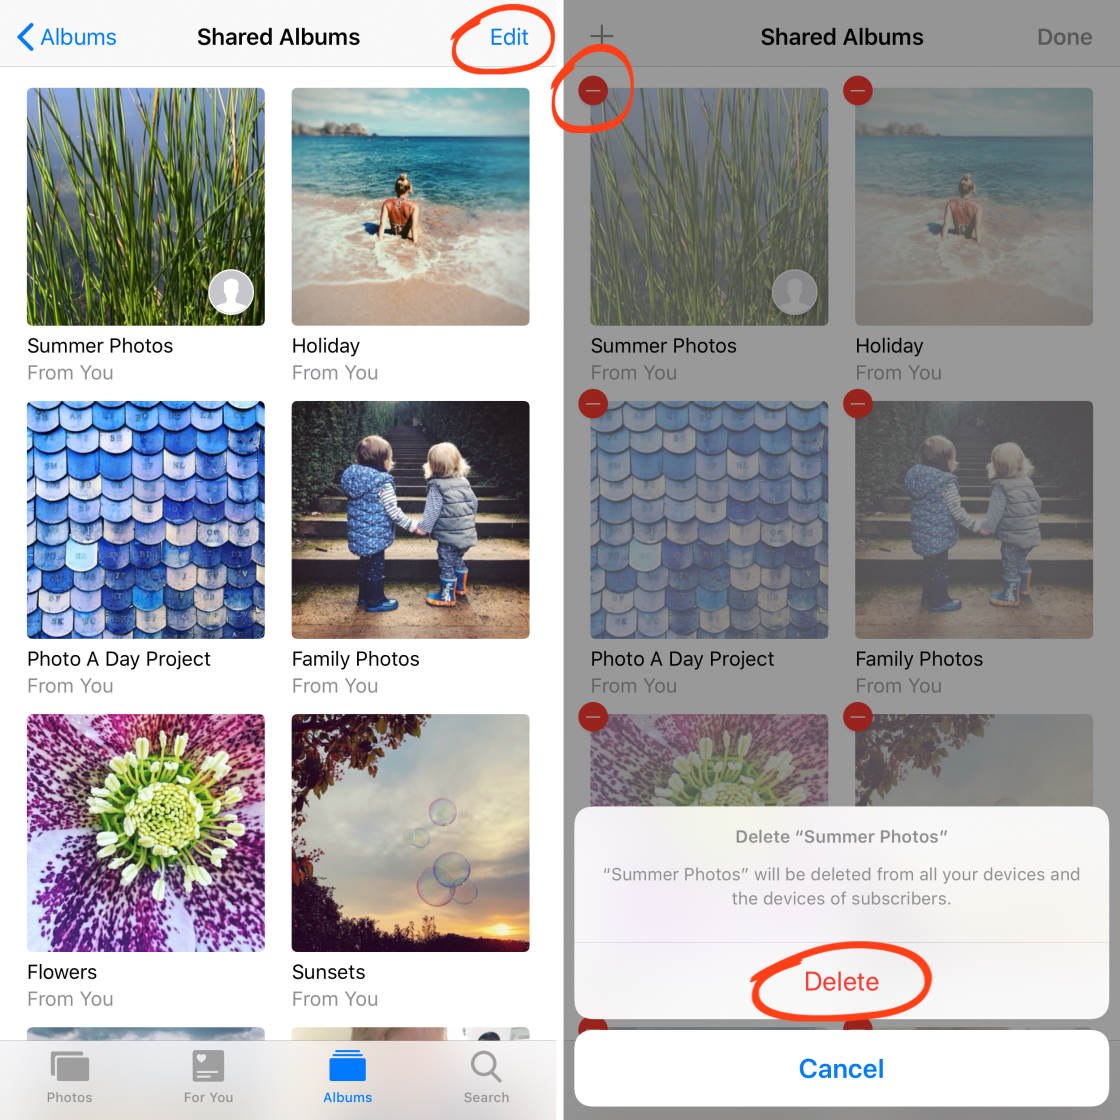
The album (and all the photos in it) will be deleted from all devices of all subscribers. Subscribers will no longer have access to the shared album.
3. How To Use iCloud Photo Sharing On A Mac Computer
Do you have photos or videos on your Mac computer that you wish to share with other people?
If so, you can use iCloud Photo Sharing in the Mac Photos app – just like you do on your iPhone.
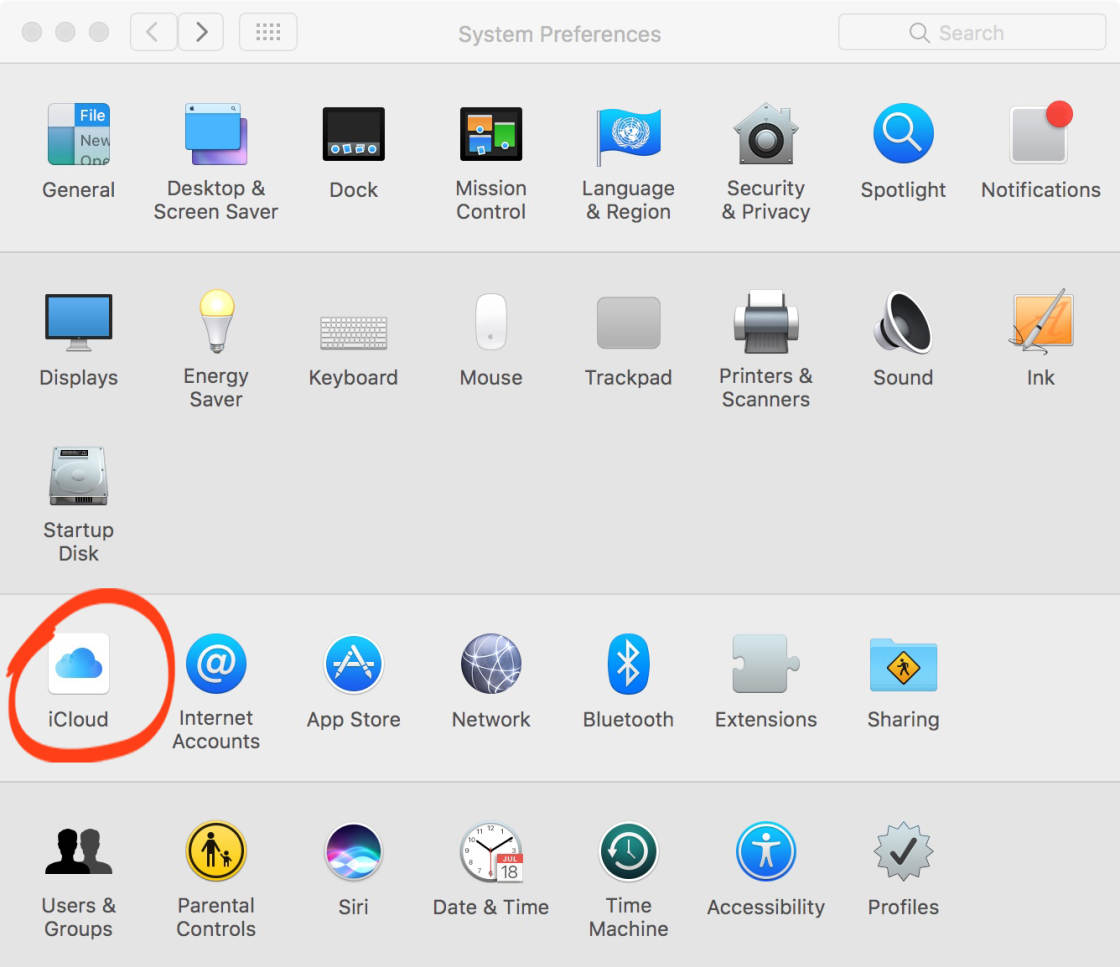
On your Mac, make sure you're signed in to iCloud with your Apple ID. Do this by clicking the Apple icon at the top left of the screen, then go to System Preferences > iCloud:
Once you're signed in to iCloud, open thePhotos app on your Mac.
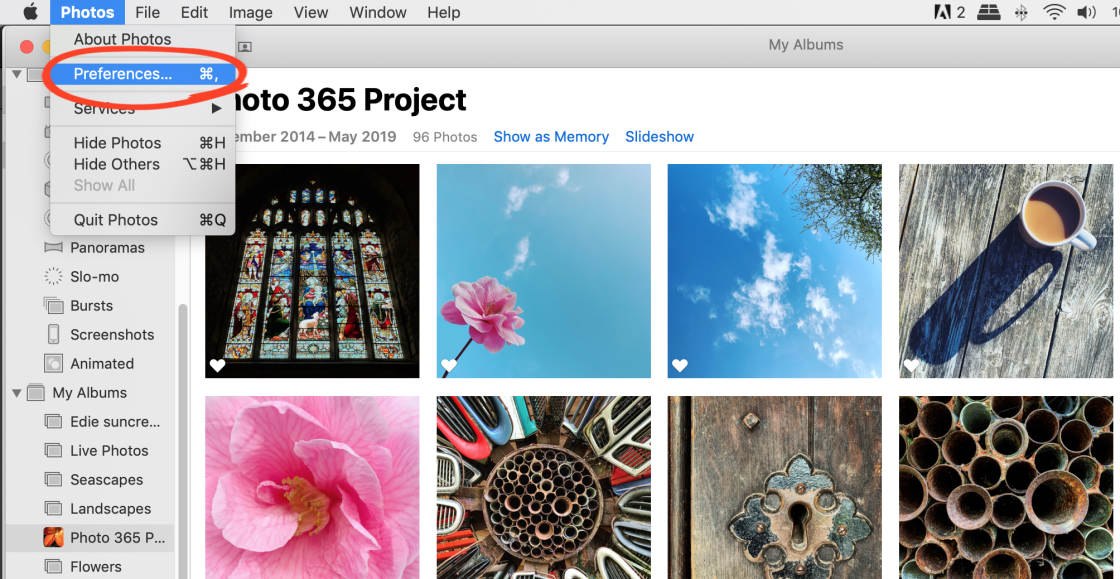
To ensure iCloud Photo Sharing is switched on, click Photos at the top left of the screen, then select Preferences:
Select theiCloud tab. Then ensure the Shared Albumsbox is checked:
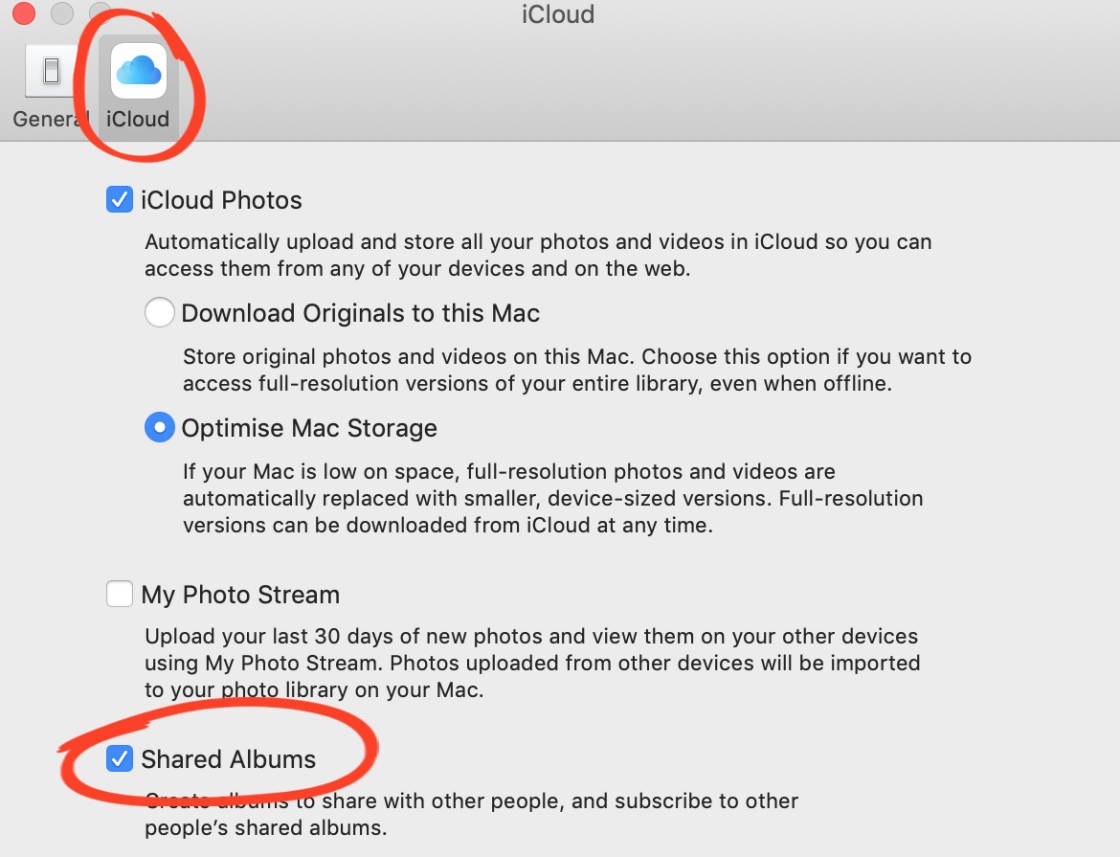
Close the iCloud dialog box.
To create a shared folder on your Mac, ensure thePhotos app is open.
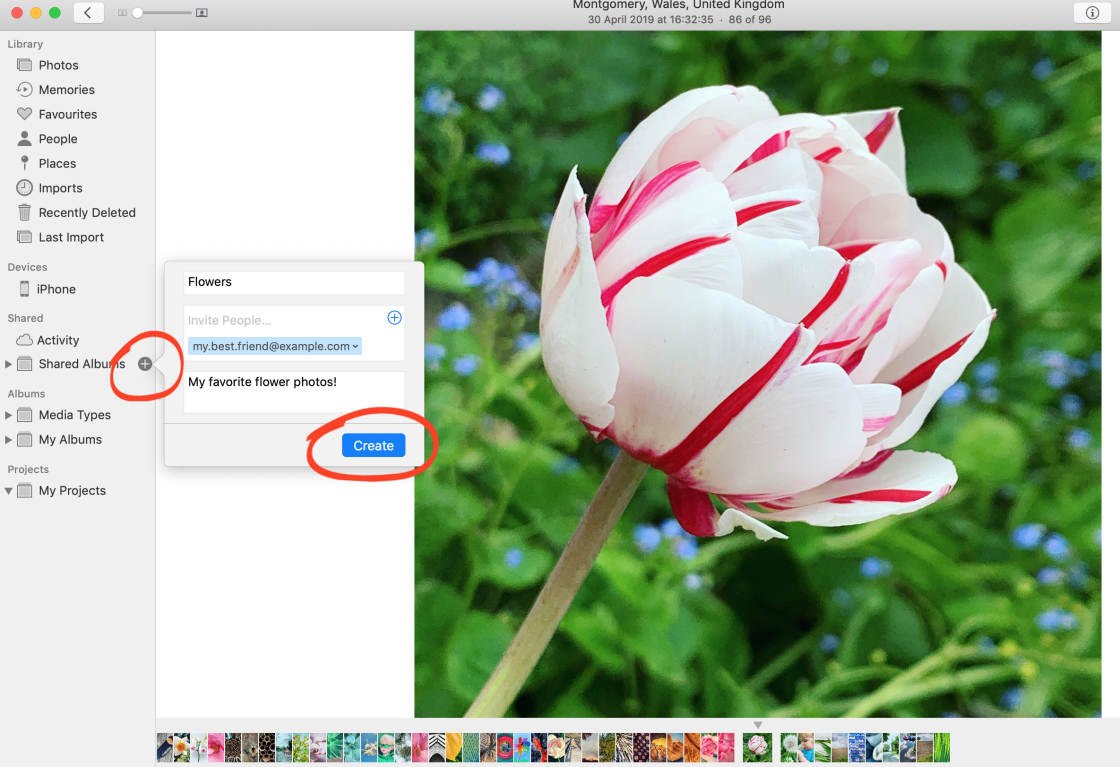
On the left side menu, hover your mouse over Shared Albums and click the [+] icon. Give your album a name, invite people, and add a comment if you wish. Then click Create:
You can now add photos to the shared album. Select the photo you want to add (or select multiple photos by holding down the Shift or Command key).
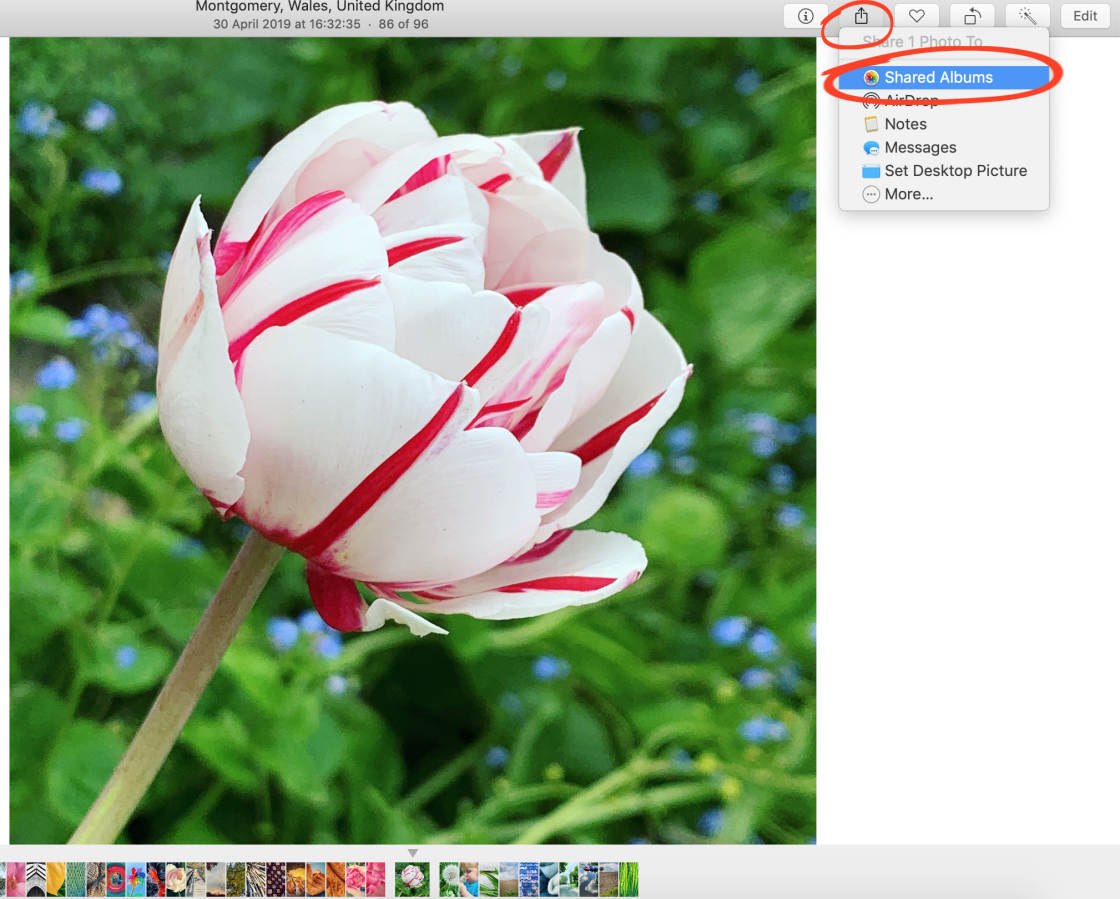
Click the Shareicon (square with up arrow) at the top of the screen. Select Shared Albums from the dropdown menu:
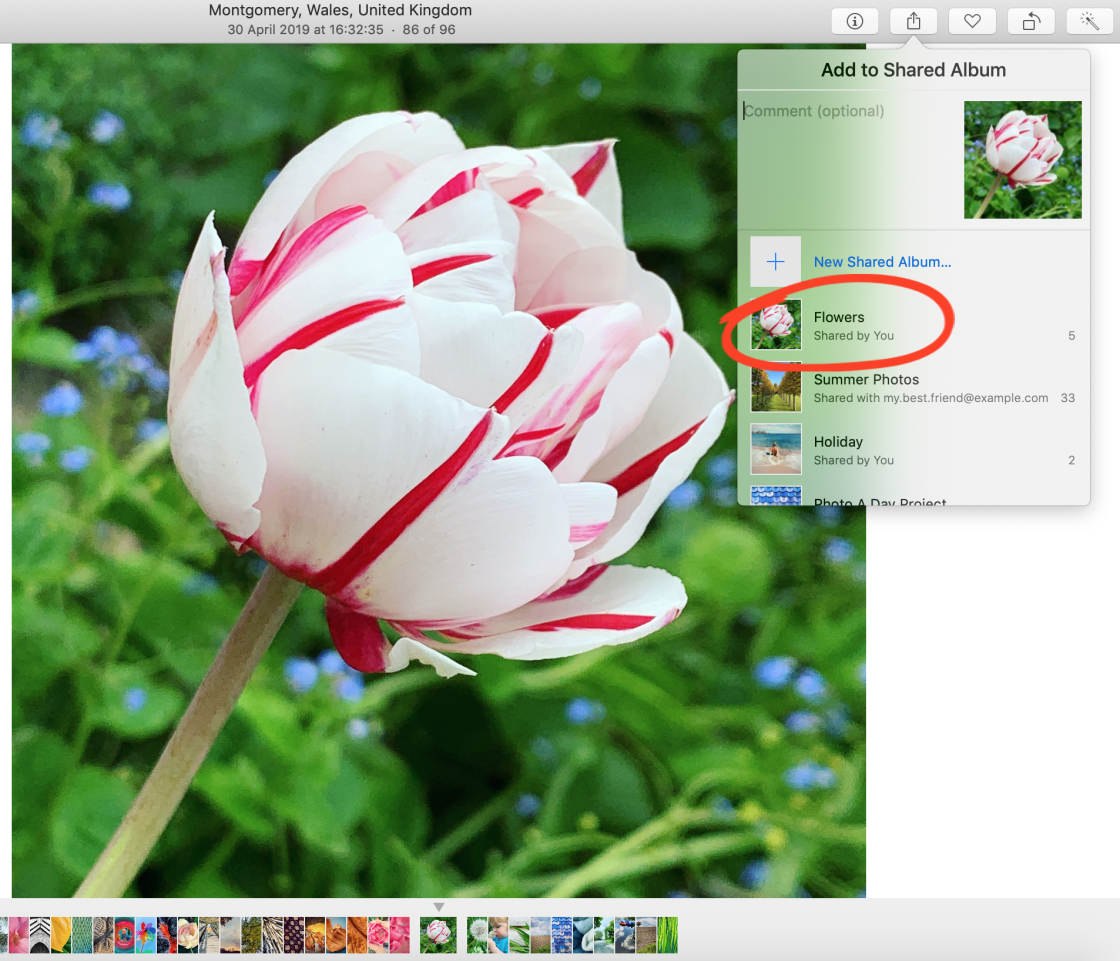
Click the album that you want to add the photo to:
4. How To Use iCloud Photo Sharing On A Windows Computer
If you have a Windows computer, you can still use iCloud Photo Sharing to share your photos with others.
You can create shared albums on a Windows computer as long as you have an iCloud account/Apple ID.
To enable iCloud Photo Sharing on Windows, download and install the iCloud For Windows software on your computer. Click here to download iCloud For Windows from the Apple website.
Once you've installed iCloud For Windows, open it and sign in with your Apple ID. Use the same Apple ID that you use on your iPhone.
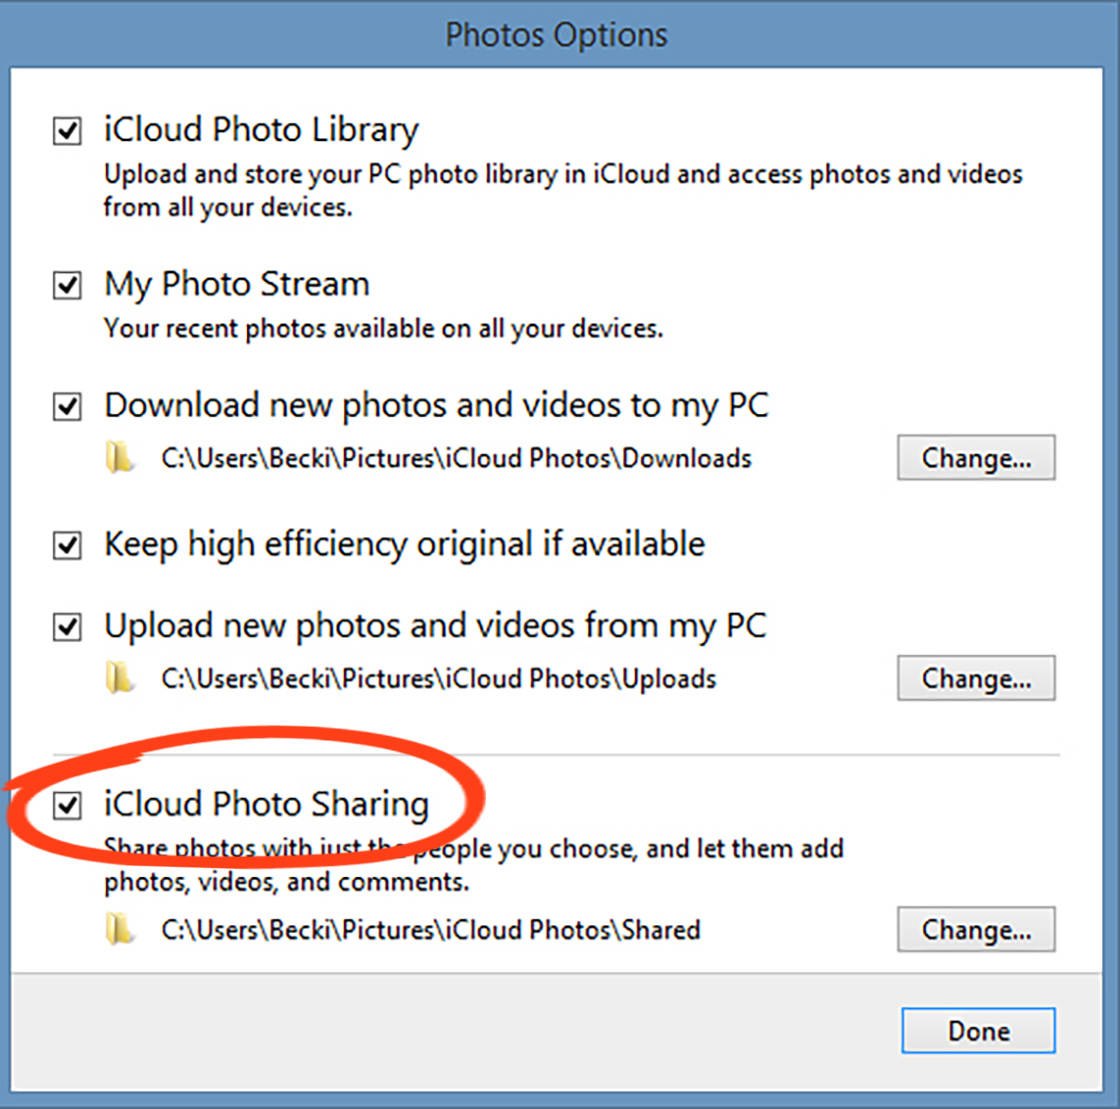
Ensure the Photos box is checked. Then click on Options beside Photos:
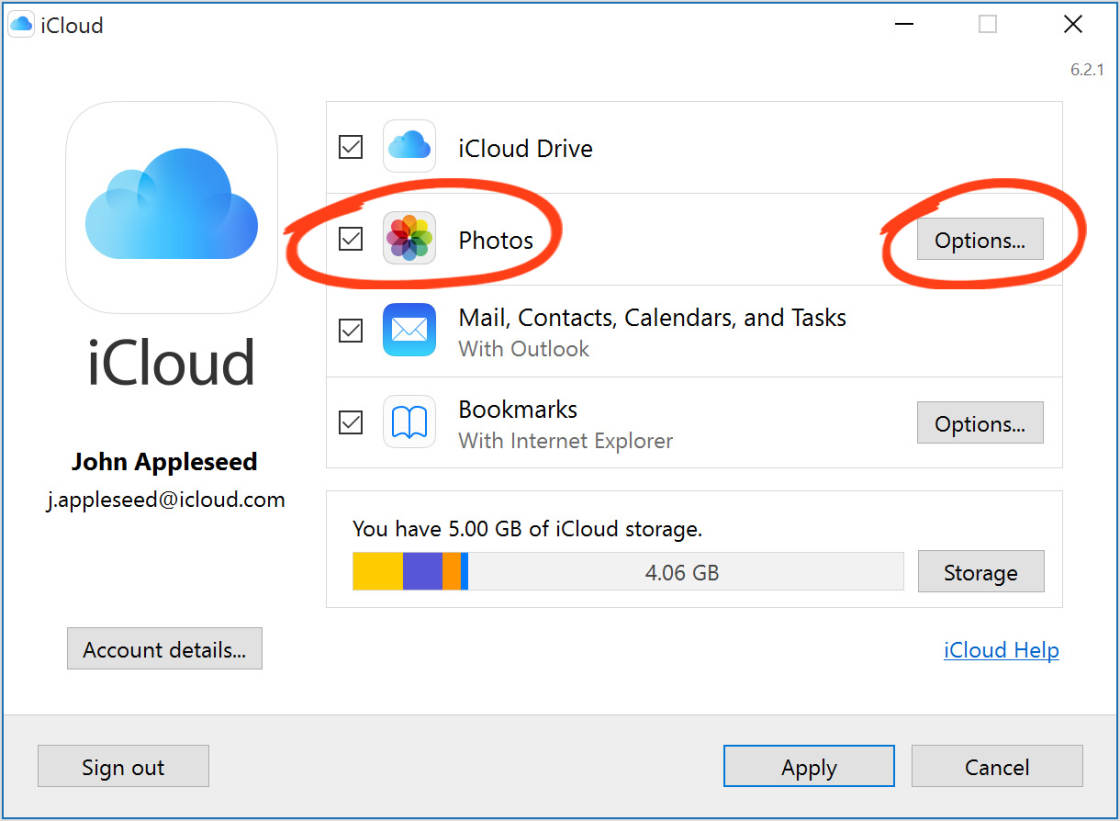
Check theiCloud Photo Sharing box. Click Done, then click Apply:
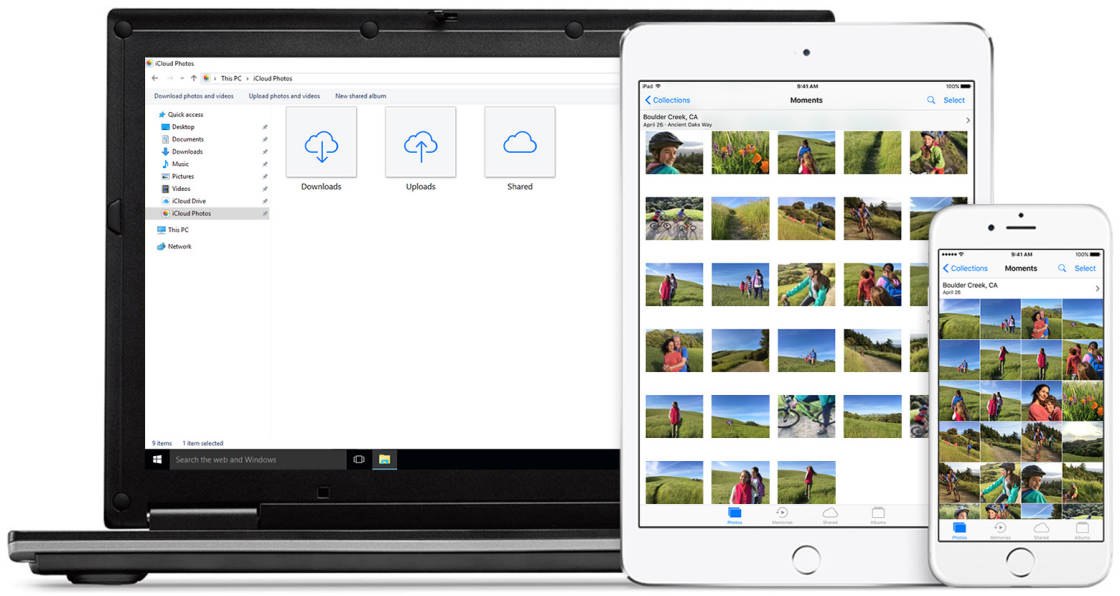
Now you can create a shared album and invite people to view your photos. OpenFile Explorer on your computer. Then open iCloud Photos from the left-hand sidebar:
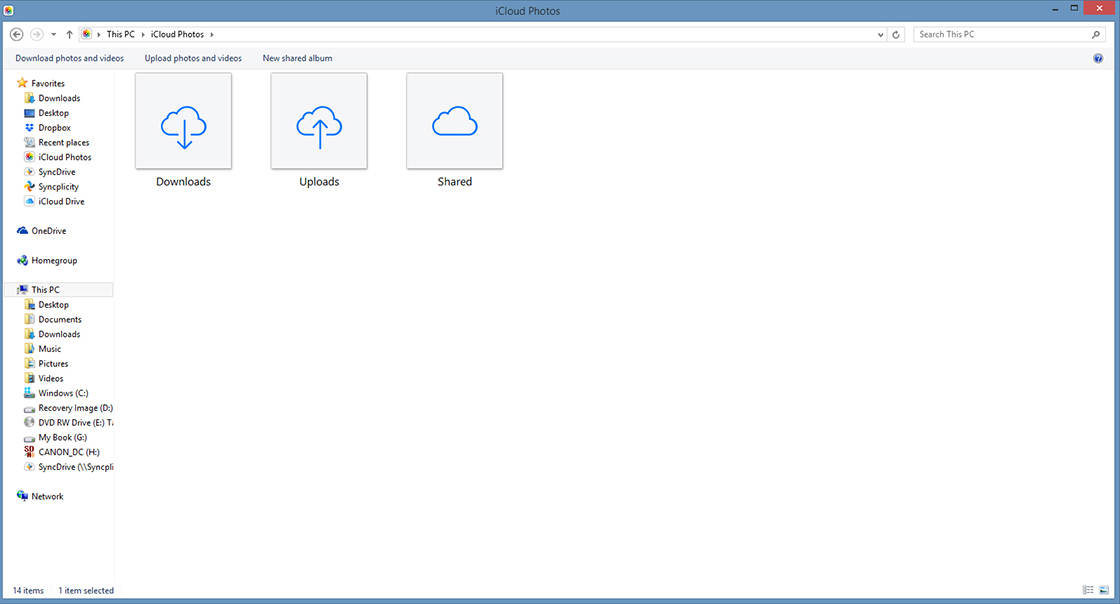
Click the New Shared Album button at the top of the screen. Add the iCloud email addresses for the people you want to invite.
Name your shared album, and click Next. Select the photos you want to add, then click Done.
Your photos will be shared to the album. Other subscribers can now see your pictures.
You can share up to 200 albums via iCloud Photo Sharing. And each shared album can contain a maximum of 5,000 photos or videos.
The great thing about iCloud Photo Sharing is that photos and videos in shared albums don't count against your iCloud storage limit.
So you don't need to worry about upgrading your iCloud storage plan. And it will never cost you any money to share your photos!
How To Remove Icloud Link From Iphone
Source: https://iphonephotographyschool.com/icloud-photo-sharing/
Posted by: hightowerforef1989.blogspot.com
0 Response to "How To Remove Icloud Link From Iphone"
Post a Comment