

how to fix chipped paint on car
Although an auto body paint shop remains the best place to get your car painted, there are a few instances where small jobs can be carried out yourself. Auto body paint shops can be fairly expensive and small accident repairs can be easily completed at just a fraction of the cost.
Step 1 – Be Realistic
There's a project out there for every DIYer, and for those who are up for the challenge, repainting minor blemishes on your own car may be one of the more difficult, yet rewarding ones. Sometimes it's about the bragging rights though, isn't it? If an auto paint job is on your bucket list of projects, then by all means, give it a try, but we recommend it only if the job is relatively small.
The difficulties involved in preparing and refinishing an entire vehicle are numerous and painting a large number of panels outside of a specialist low-bake oven can be exceedingly dangerous, especially if proper respiratory equipment isn't worn. Focus on one or two panels, but no more.
Do not use professional guns or compressors for this task. Aerosols are much better for small repair jobs when they are being used outside of a low-bake oven.
Step 2 – Repairs and Rust
To create a smooth and near professional look, repair any dents and remove spots of rust before beginning. For small dents, access the rear of the car body panel and push gently toward the outer edges of the impression. Continue to push outwards, working toward the middle of the dent until the majority of the defect is removed. With the appropriate sized grit of sandpaper, sand down the dent and surrounding area with a P80 grade disk on your orbital sander and remove excess dust before applying a thin layer of automotive body filler. Allow to dry before smoothing with P120 grade paper on a rubber block. Finish the filler with a light rub from P240 grade paper.
You can sand out light rust spots easily using medium grit P80 sandpaper, but heavier areas may also need to be treated then sealed using a rust converter. Don't forget your safety mask and goggles!
Step 3 – Panel Preparation
Feather out the repaired edges using a very fine microgrit P320 sanding disk on a random orbital sander. This should help to even out old layers of paint to promote an entirely flat surface. Rub down the remainder of the panel with P500 paper for a smooth, paintable finish. Wipe down the surface with a clean rag and mask off areas for priming. Make sure that masking is of sufficient size to prevent overspray from landing on adjacent panels.
Step 4 – Priming
The repaired area should be primed using a high-solid aerosol primer. Apply four even coats to the repair making sure that each cross coat overlaps the last for a smooth, consistent texture. Always wear some form of protective respiratory equipment if possible. Allow to dry thoroughly before rubbing down using a superfine piece of P800 grade wet-and-dry paper on a rubber block.
The panel should be checked in sunlight for any remaining signs of dents and imperfections before painting commences.
Step 5 – Clean and Mask off Areas
Clean the prepared panel thoroughly, removing all dust. Thoroughly degrease the panel using an auto body paint specialist product or a diluted mixture of water and white spirit at a ratio of approximately 6:1. This can be applied using a clean lint-free cloth. Mask the panel using a good quality masking tape and layers of newspaper or masking paper. Be sure to provide enough coverage to prevent excess spray from marring adjacent panels. Prevention is the key, but if you find yourself dealing with overspray, try another DIY to fix that.
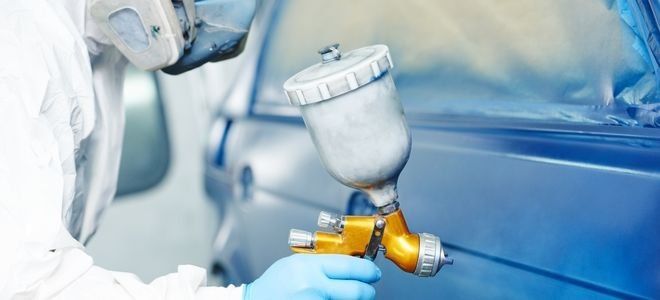
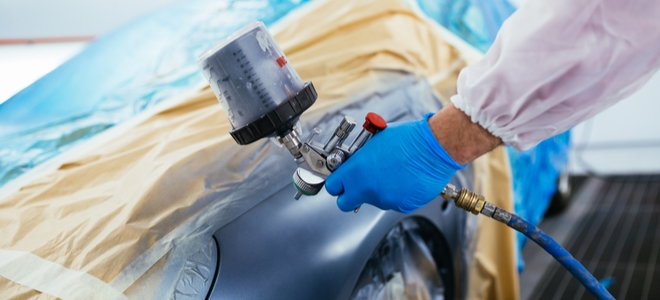
Step 6 – Painting
Apply three even coats of paint, making sure each cross coat overlaps for an even finish without dry edges. Allow paint to flash off (dry before applying the next coat) for several minutes before applying the next coat. If primer continues to show through the paint, simply add more coats until covered. Allow to dry and unmask. Remember that effective respiratory equipment should be worn for this stage. Paint can be polished after it has been allowed to cure for a period of no less than 48 hours.
Step 7—Pat Yourself on the Back
If this is your first paint job, congratulations! Take a step back and evaluate your work. Despite your care and diligence, it's still possible to end up with blemishes and possibly an uneven pattern after drying. Don't be so hard on yourself. Take a deep breath and try to troubleshoot what may have gone wrong. Otherwise, embrace your mistakes and be proud of what you've been able to accomplish as an experienced DIYer, knowing there's always a next time to improve your skills!
how to fix chipped paint on car
Source: https://www.doityourself.com/stry/how-to-paint-a-car-yourself
Posted by: hightowerforef1989.blogspot.com
0 Response to "how to fix chipped paint on car"
Post a Comment